Incorporating surveys into your event is a great way to gauge attendee interest and ensure you provide content best suited to attendee interests and needs. Surveys appear on a user's screen when they navigate away from a session:

This article explains how to set up and modify surveys for your event. Topics include:
- Setting Up a Survey: External Link
- Setting Up a Survey: Social27 Survey Creator
- Viewing Survey Results
Walkthrough Video:
Setting Up a Survey: External Link
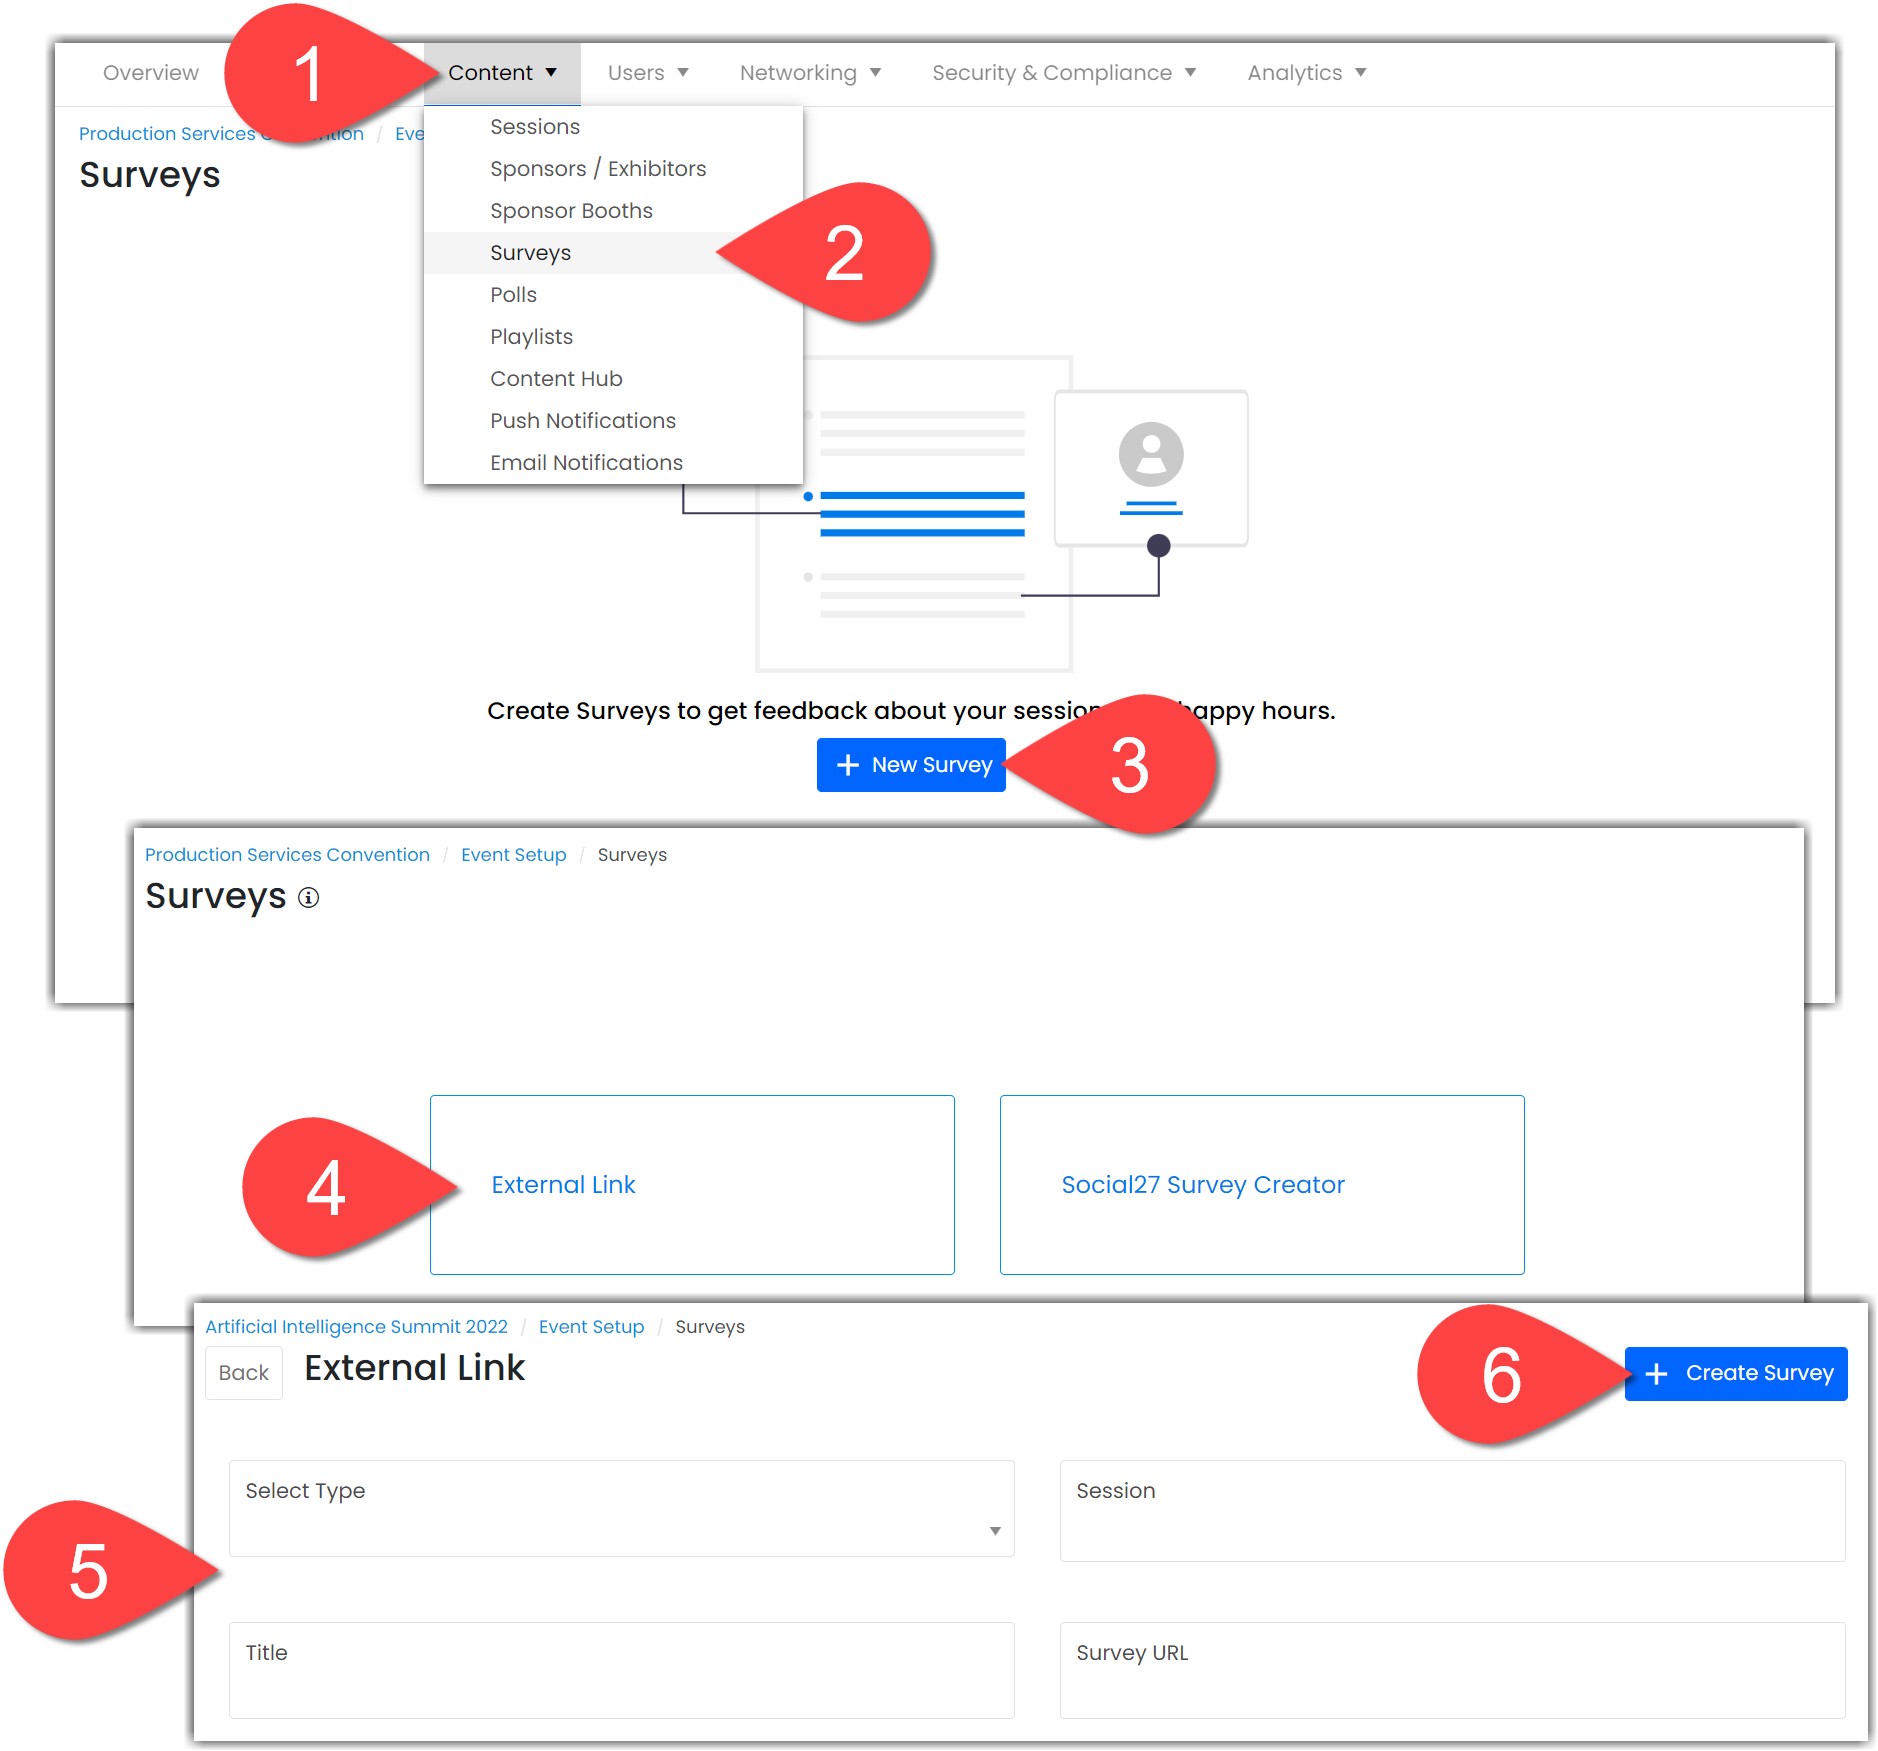
To add a new survey, log in to the platform, select a workspace, open an event, navigate to Content > Surveys using the top toolbar, and click New Survey. You can either insert an external link or click Social27 Survey Creator to build a new survey within the Social27 platform.
If you would like to use a survey you have created in a third-party tool, select External Link. Use the Select Type dropdown menu to indicate whether you would like the survey to appear at the end of a session or Happy Hour, and click Session / Happy Hour to specify which session or Happy Hour should be associated with the survey. (If you're not sure yet, you can always come back later to add this information.)
Give the survey a title and enter the URL. Click Create Survey to save your new survey.
Setting Up a Survey: Social27 Survey Creator
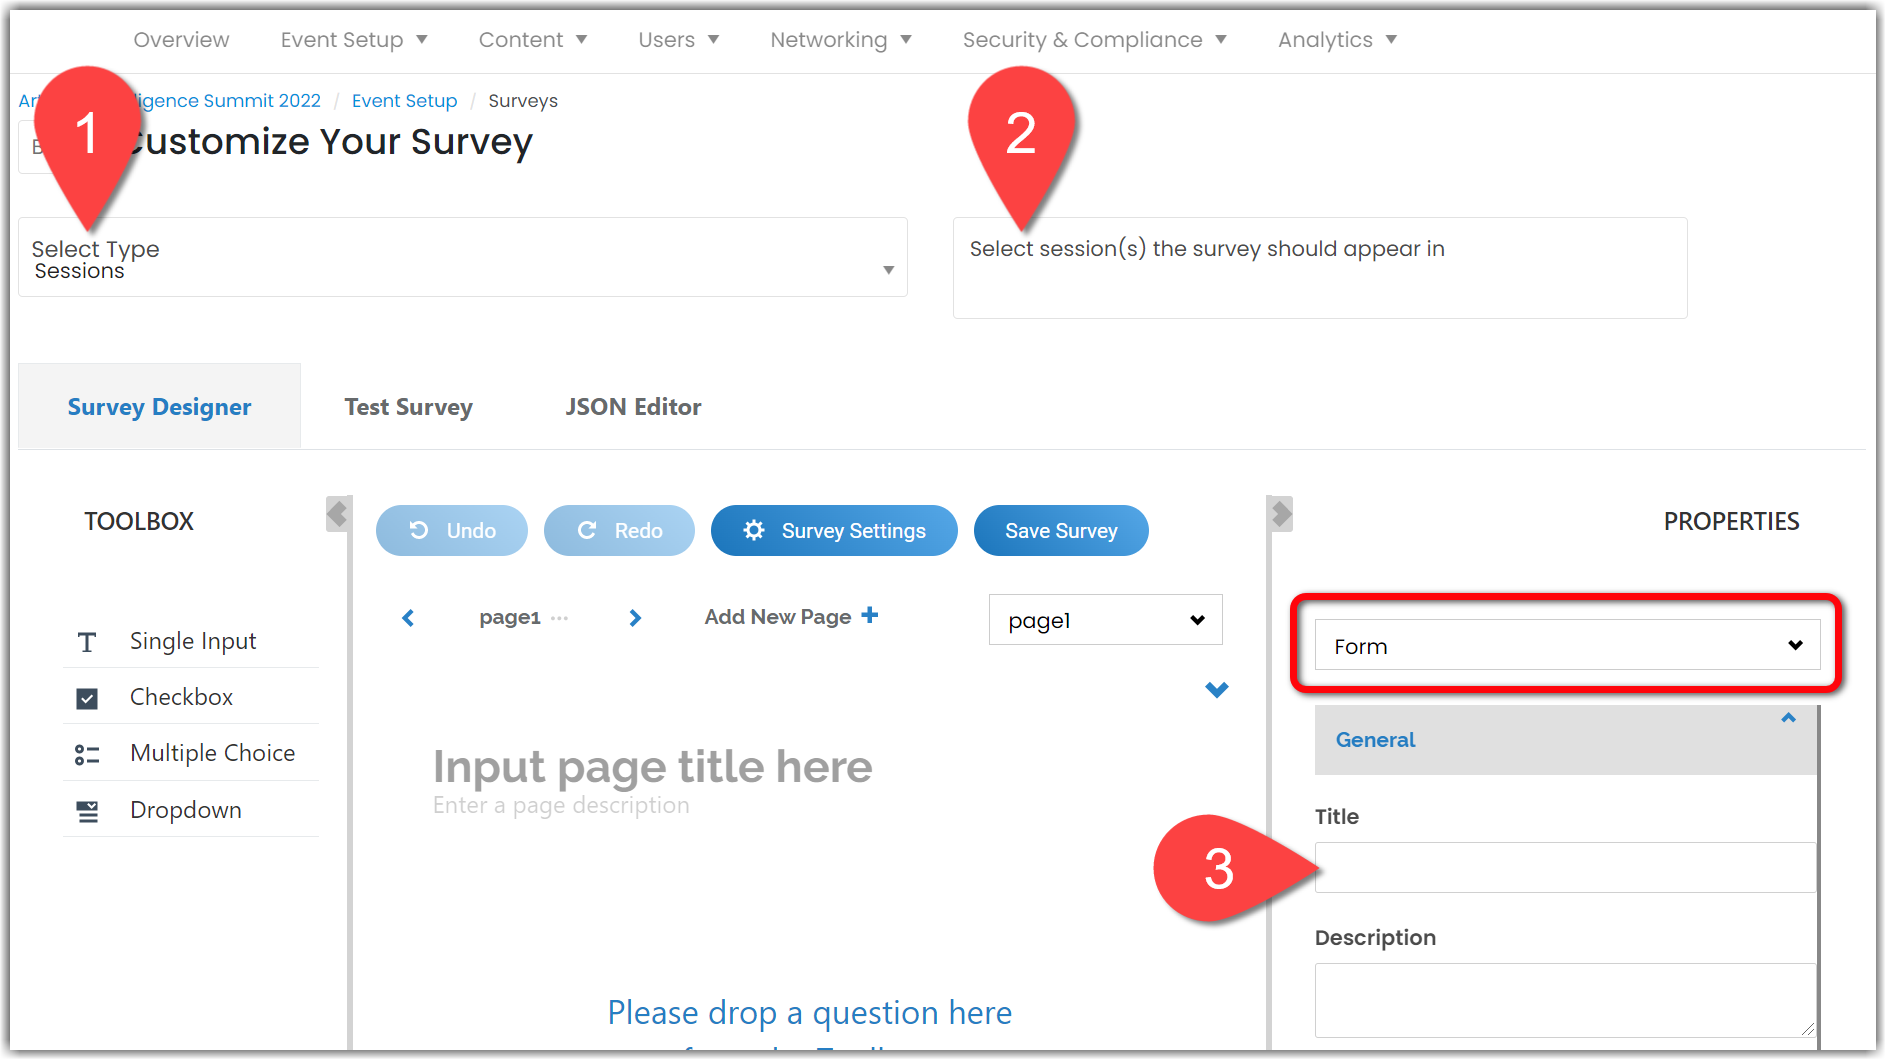
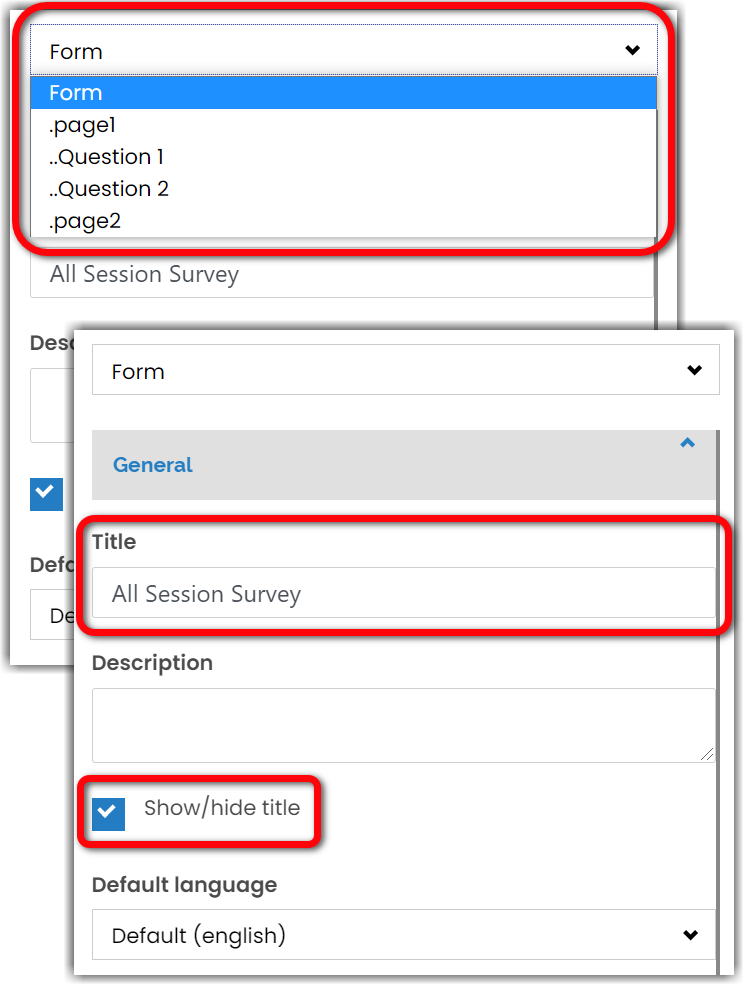
If you select Social27 Survey Creator, first set which session/Happy Hour the survey is associated with, then enter a name for the survey in the the General section of the Properties menu. Make sure the dropdown menu is set to Form when you create the title. The other options in this dropdown will allow you to set titles for survey pages and individual questions.
Adding Survey Questions and Pages
To add questions to your survey, select one of the question types from the Toolbox menu. Your selected question will appear in the center panel. Note that you can use the page menu at the top of this center panel to include all questions on a single page or to add multiple pages.

There are four different types of question you can add to a survey:
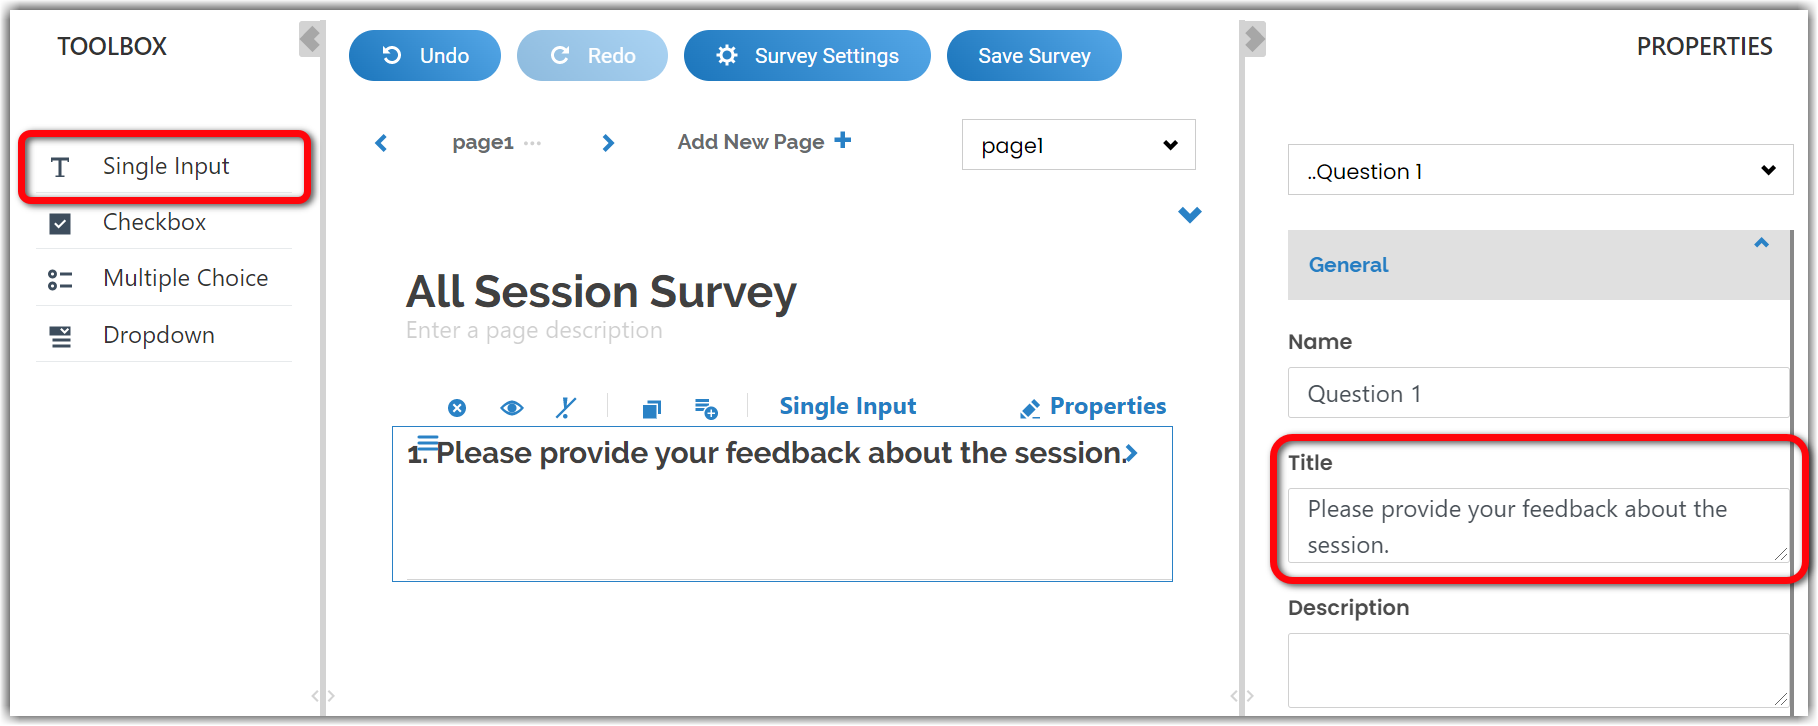
- Single Input: This question type is an open text field and is often used to allow users to enter feedback or comments. Indicate what information you want your attendees to provide by giving the question a title or by entering placeholder text in the Properties menu. (Make sure you have selected your question in the Properties menu dropdown.)
- Checkbox: Checkbox questions allow attendees to make multiple selections. Add additional answer options by clicking the plus sign that appears below the answer options list, and remove options by hovering over them and clicking the x icon.

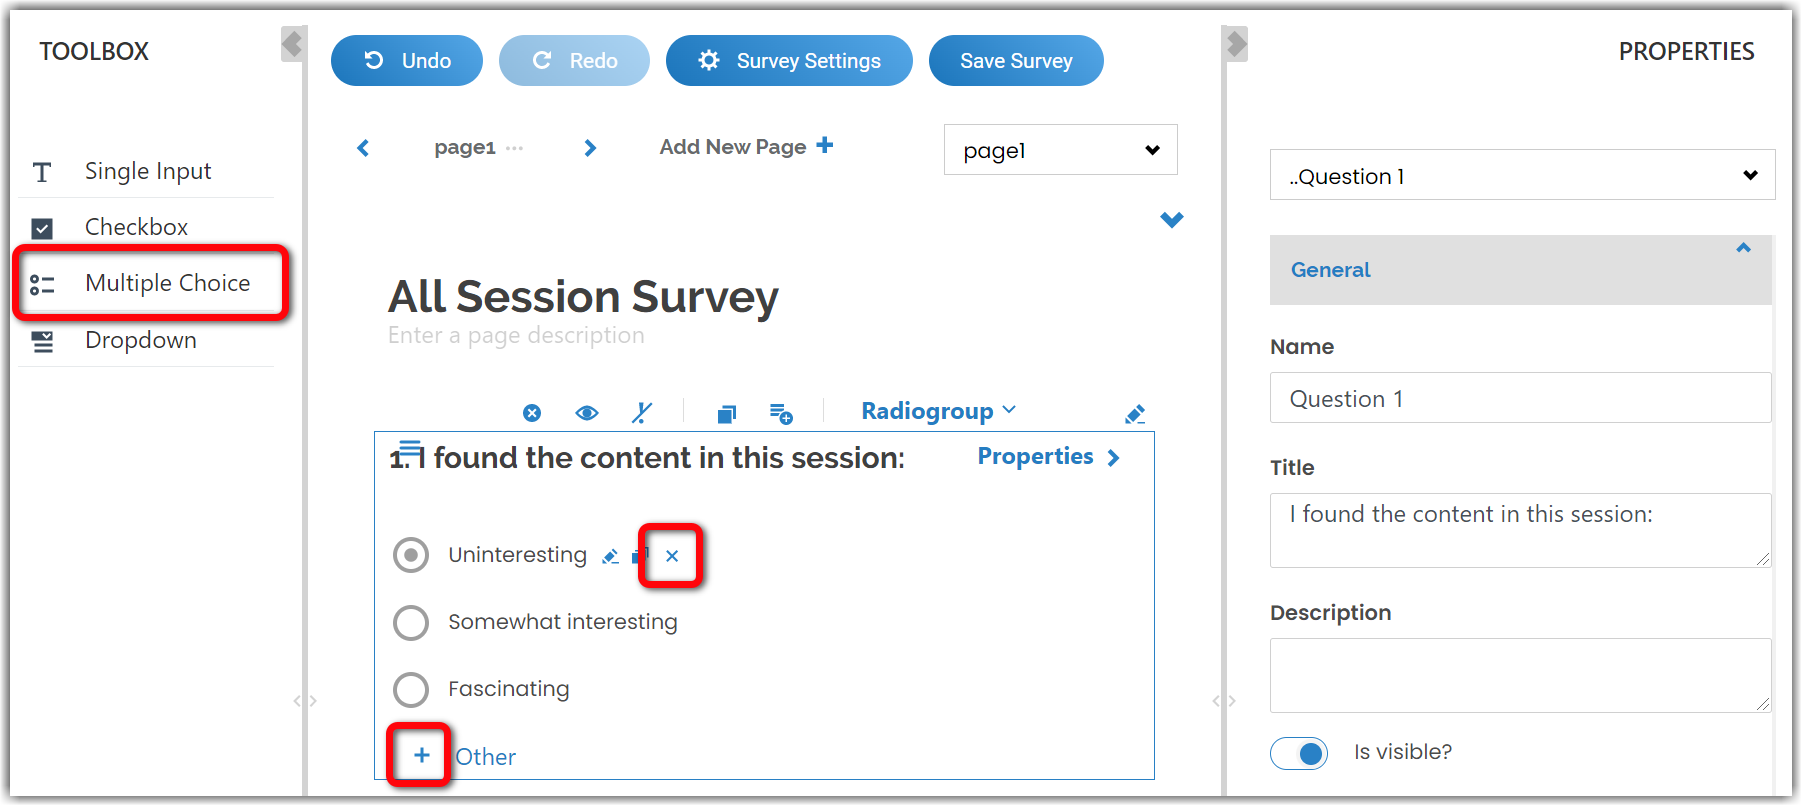
- Multiple Choice: Multiple Choice questions allow attendees to select a single answer. Add additional answer options by clicking the plus sign that appears below the answer options list, and remove options by hovering over them and clicking the x icon.
- Dropdown: Dropdown questions allow attendees to select a single response from a dropdown menu. Use this question type (as opposed to the Multiple Choice type) if you want to present many possible responses but don't want to clutter the screen by showing all options in a long list. Add additional answer options by clicking the plus sign that appears below the answer options list, and remove options by hovering over them and clicking the x icon.

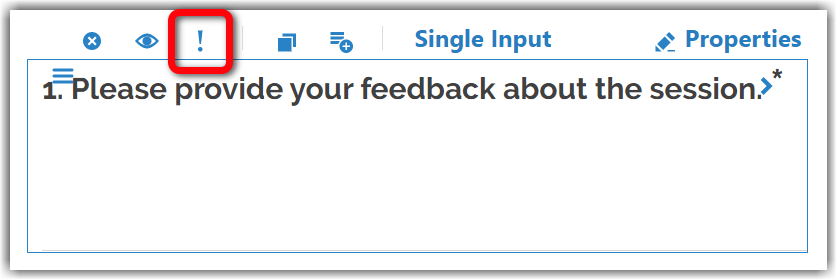
You can require a response to survey questions by clicking the exclamation point icon in the question toolbar.
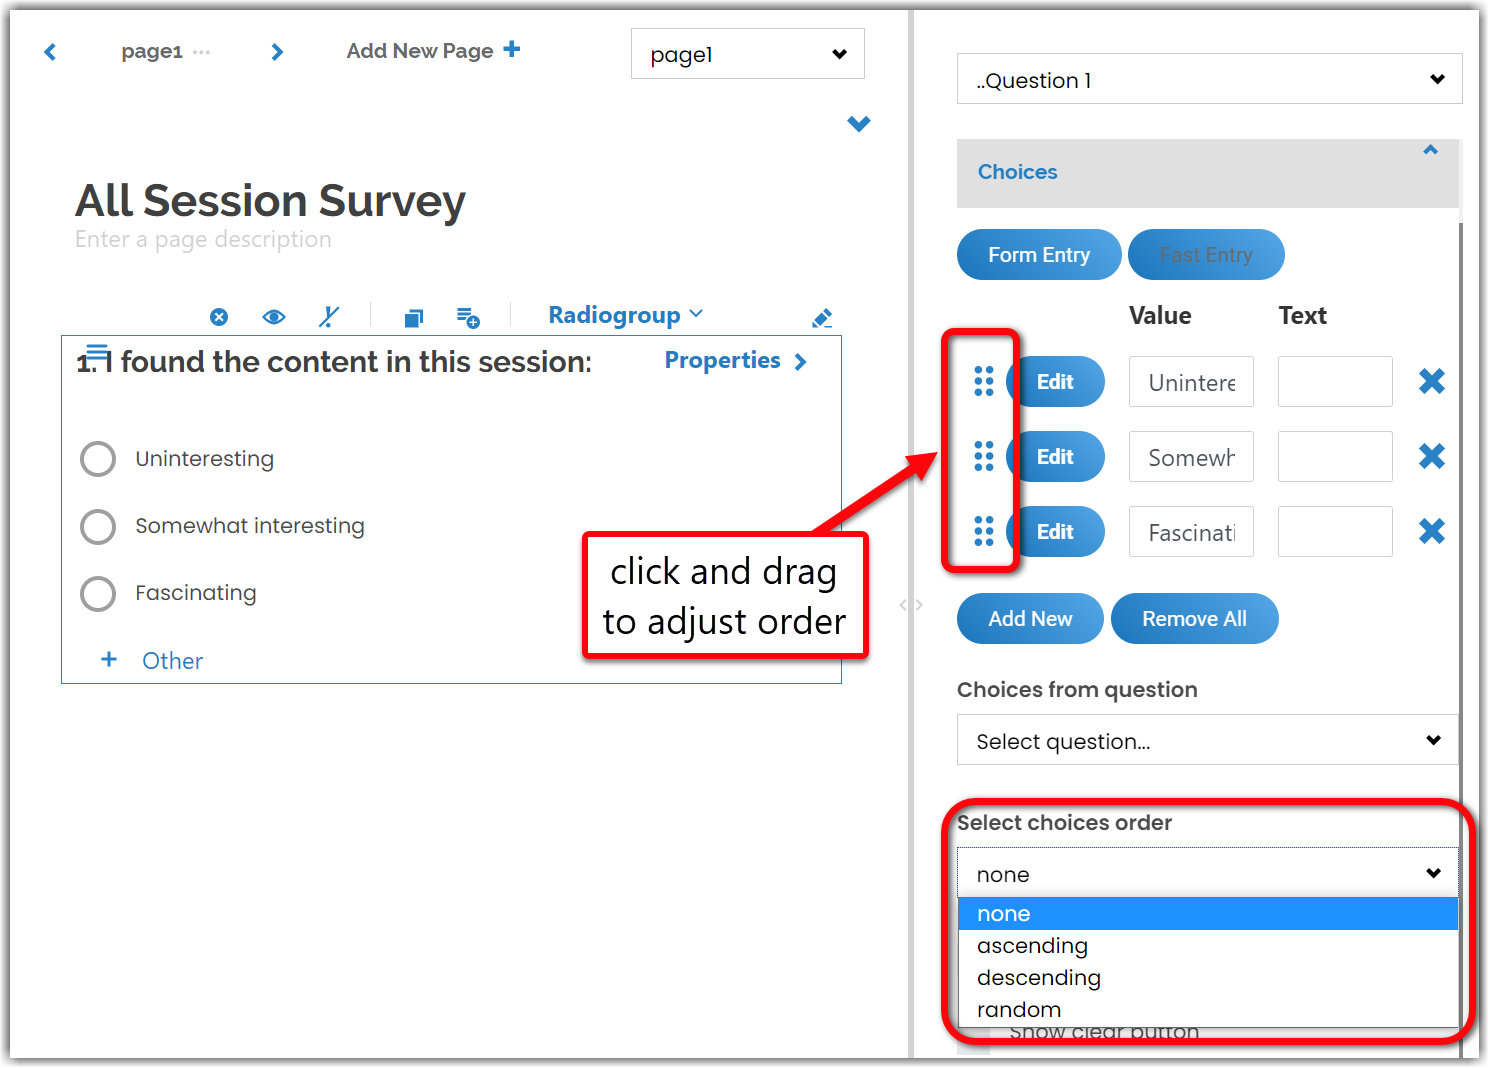
Once you've created a question, use the Properties menu > Choices section to set the order in which your answer options appear. Options can appear in the order in which you created them (none), in alphabetical order (either ascending or descending), or in random order.
Rearranging and Deleting Survey Questions and Pages
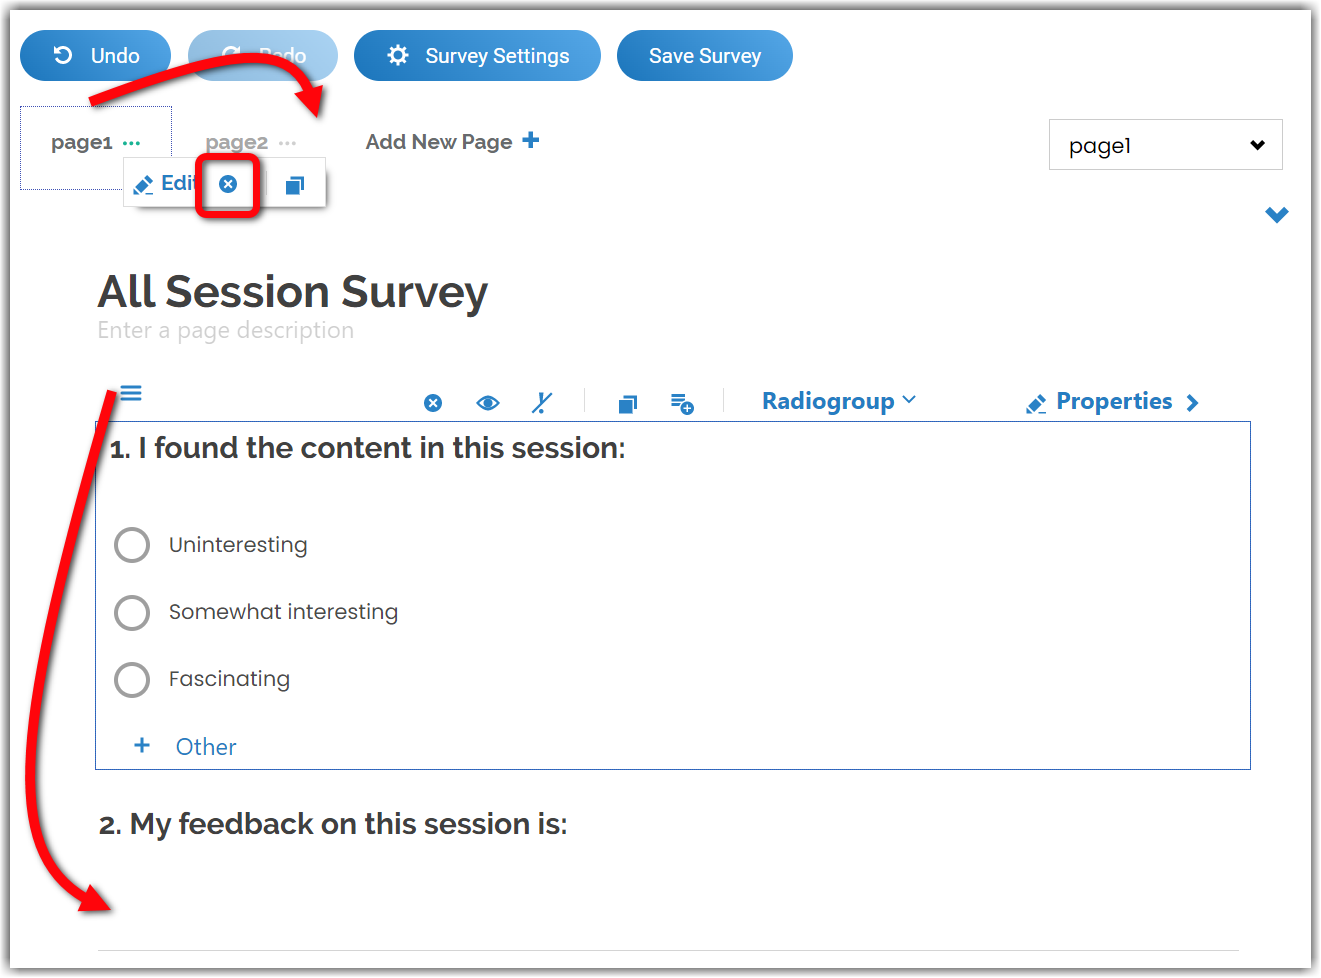
Re-arrange survey questions that appear on the same page by clicking the three horizontal lines in the question toolbar and dragging the question up or down.
If your survey has multiple pages, rearrange them by clicking and dragging the page back and forth in the center panel menu. Remove pages by clicking the x.
Editing Survey Properties
Use the Properties menu on the right side of the screen to edit your survey settings. There are a myriad of customizations options available, but the most important ones are listed below:
General
Use the Properties dropdown menu to access your survey's various titles: form, pages, and questions. Use the checkbox to set whether or not these names are visible to attendees.
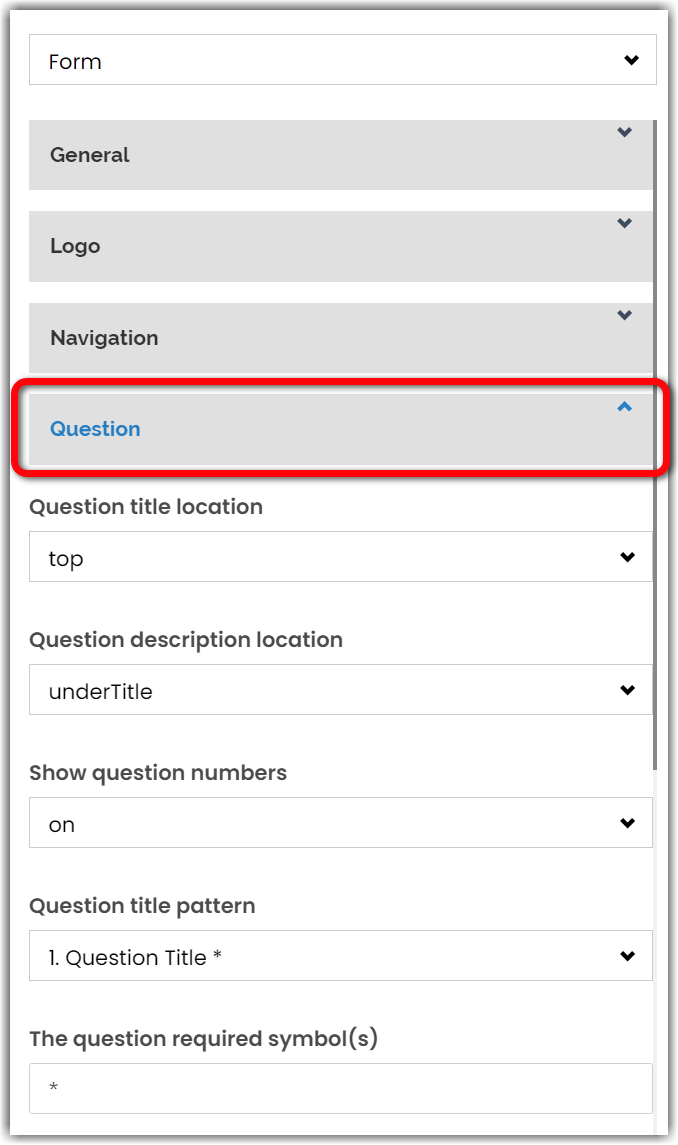
Question
If you want to customize how question names are displayed, select Question. In this section, you can set where the name appears, whether or not questions are numbered, and how question numbers are formatted.
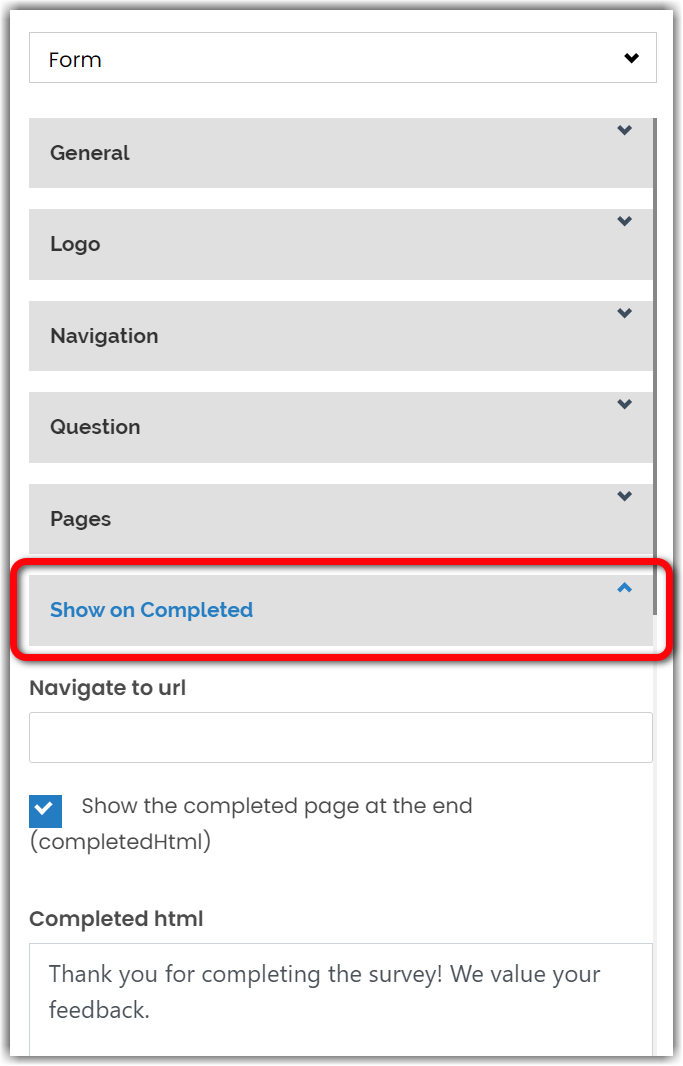
Show on Completed
If you want a message to appear to attendees after they complete a survey, navigate to the Show on Completed section. You can enter a message to be displayed to attendees here. If you prefer, you can specify that attendees be taken to a different website instead by entering a web address in the Navigate to URL field.
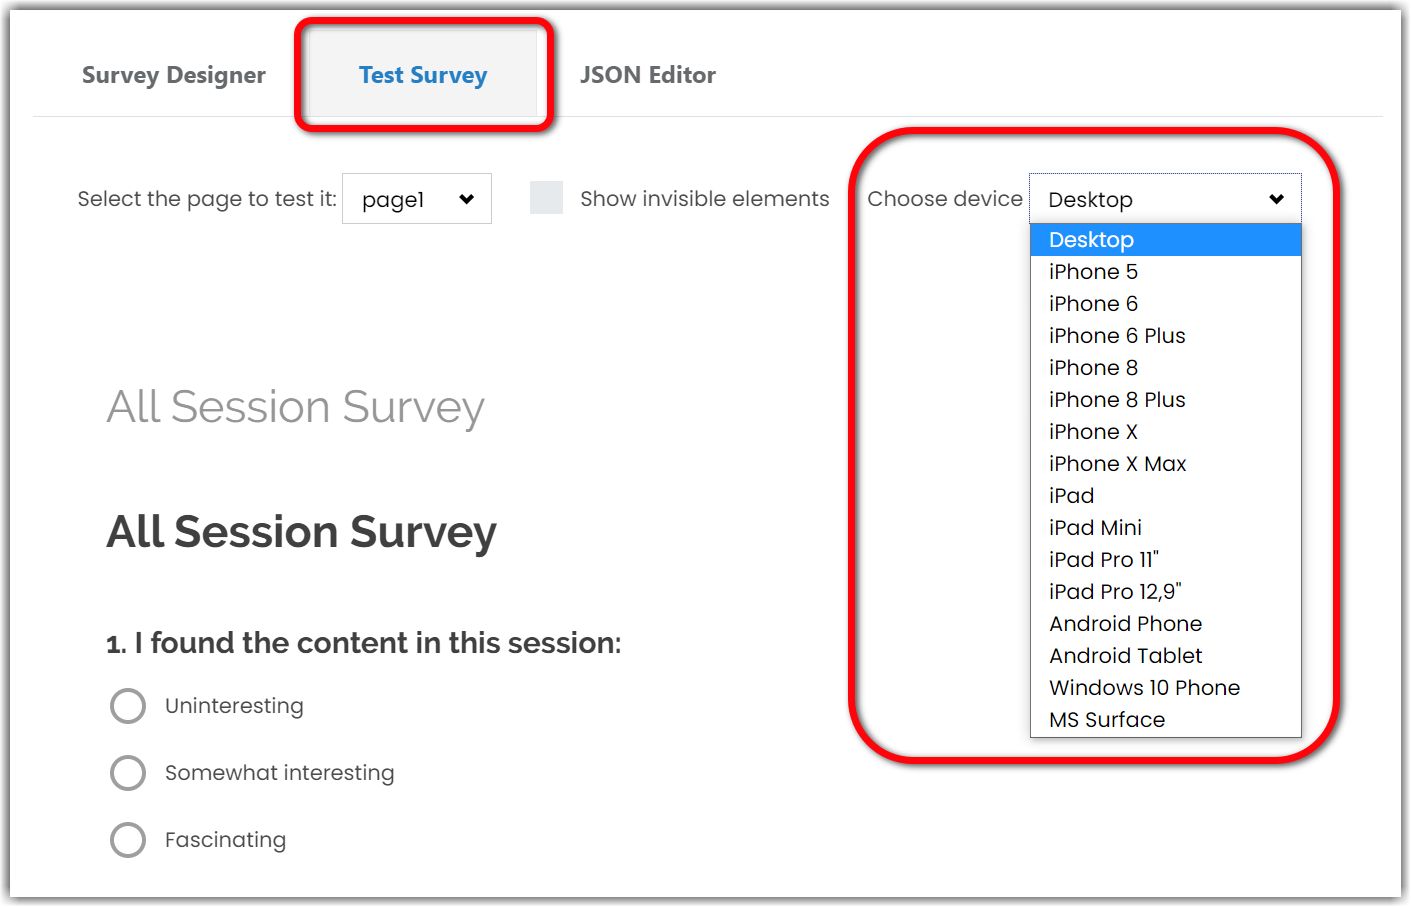
Testing and Saving Surveys
To test and preview your survey, click the Test Survey tab in the center panel. Note that you can preview how the survey would look on multiple device types.
Once your survey is complete (or if you need to pause work and come back to it), go to the Survey Designer tab and click Save Survey.

Editing and Deleting Surveys
If you ever want to edit or delete a survey, click the ellipses icon beside the survey.
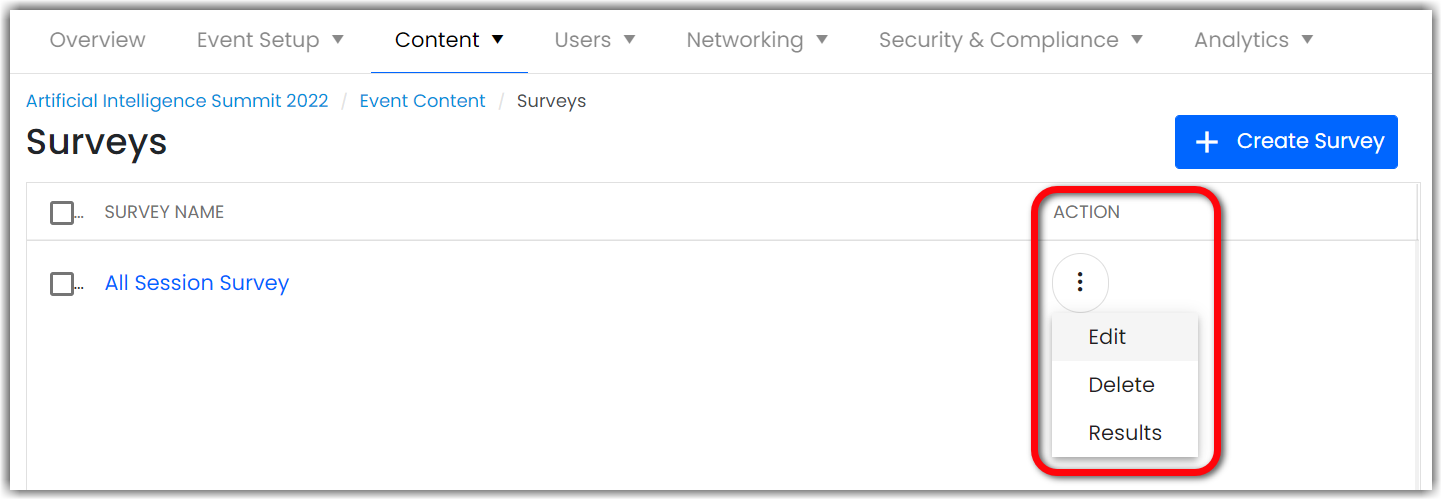
Viewing Survey Results
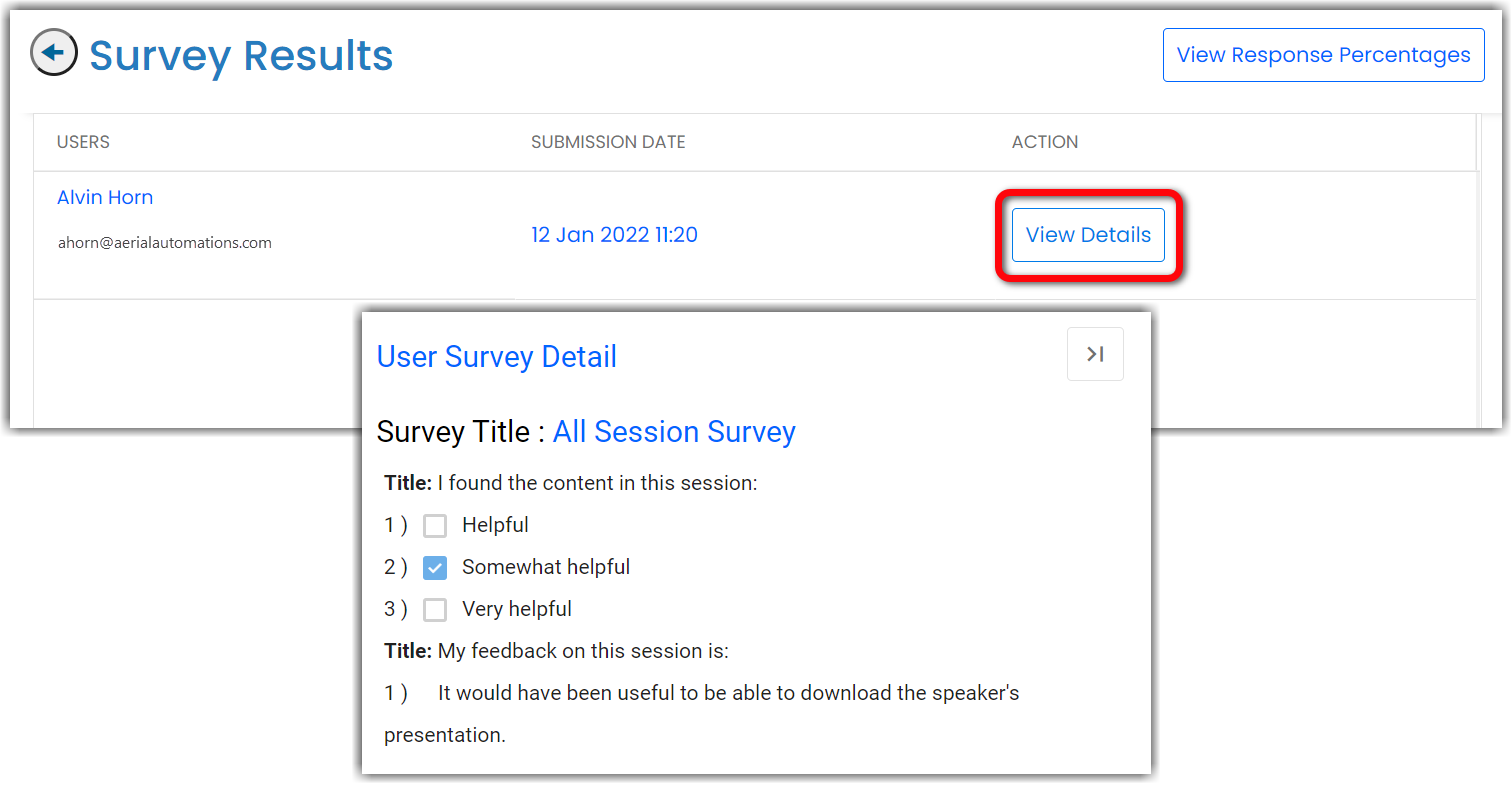
To review the results of a survey, select Results from the action menu. You will see a list of all users who have completed the survey. Clicking View Details will reveal the responses submitted by an individual user.
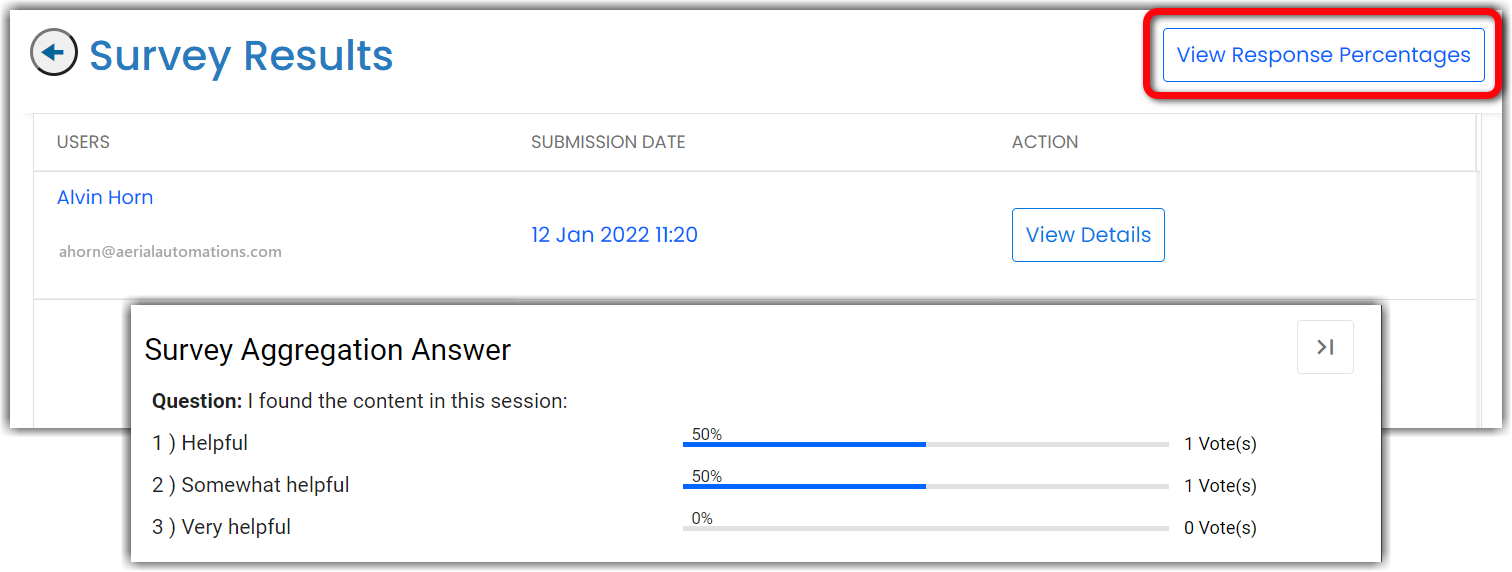
Clicking View Response Percentages will reveal summary percentages and total counts of how many users selected each answer option for each question. (Single Input questions are not included in this view.)
![]() Further Reading :
Further Reading :

Comments
0 comments
Please sign in to leave a comment.