This article explores the moderator experience of Social27 Stream.
Topics include:
- Best Practices
- Joining the Backstage
- Prepping for the Session
- Managing a Live Session
- Session Chat
- Attendees on Stage
- Observer Mode
- Session Recordings
- Ending a Session
Tip: Not all sessions use Social27 Stream. Check with your event organizer if you believe these features might be useful for your sessions.
Best Practices
Check out this article to review Social27 Stream's best practices and technical considerations (supported browsers, etc.).
Joining the Backstage
To join the backstage of a session, navigate to the Sessions page and select your session from the catalog.
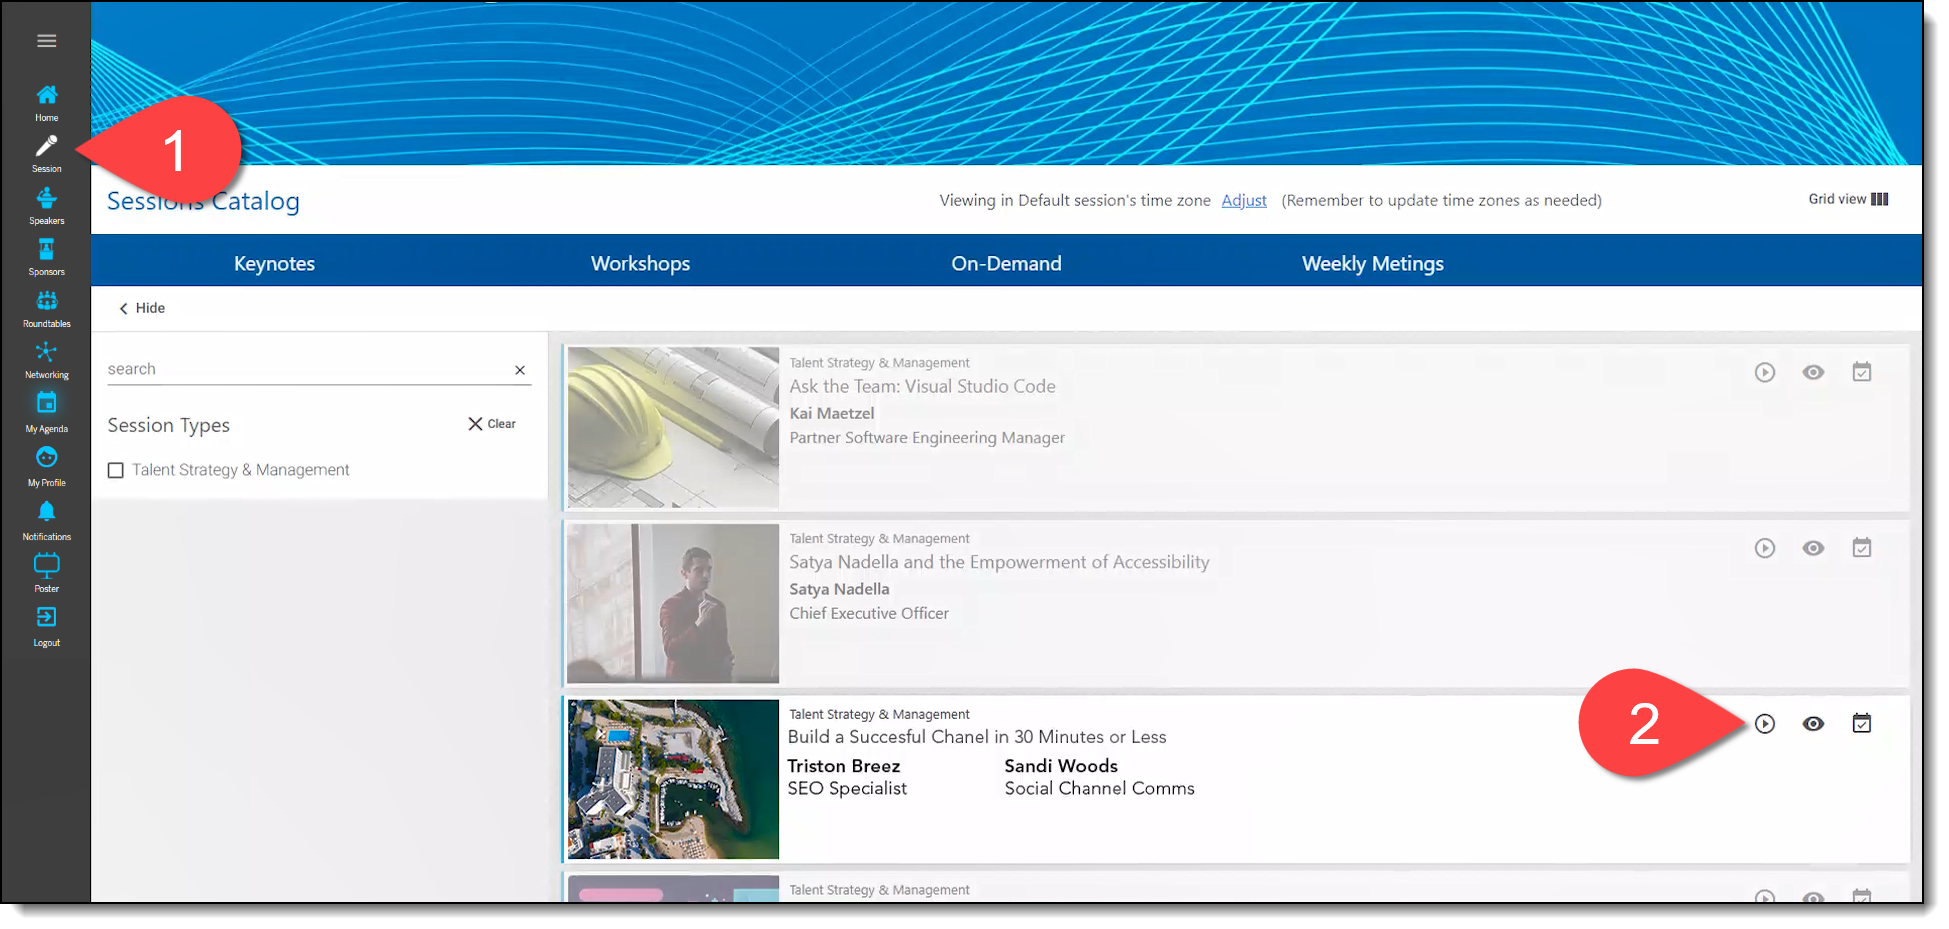
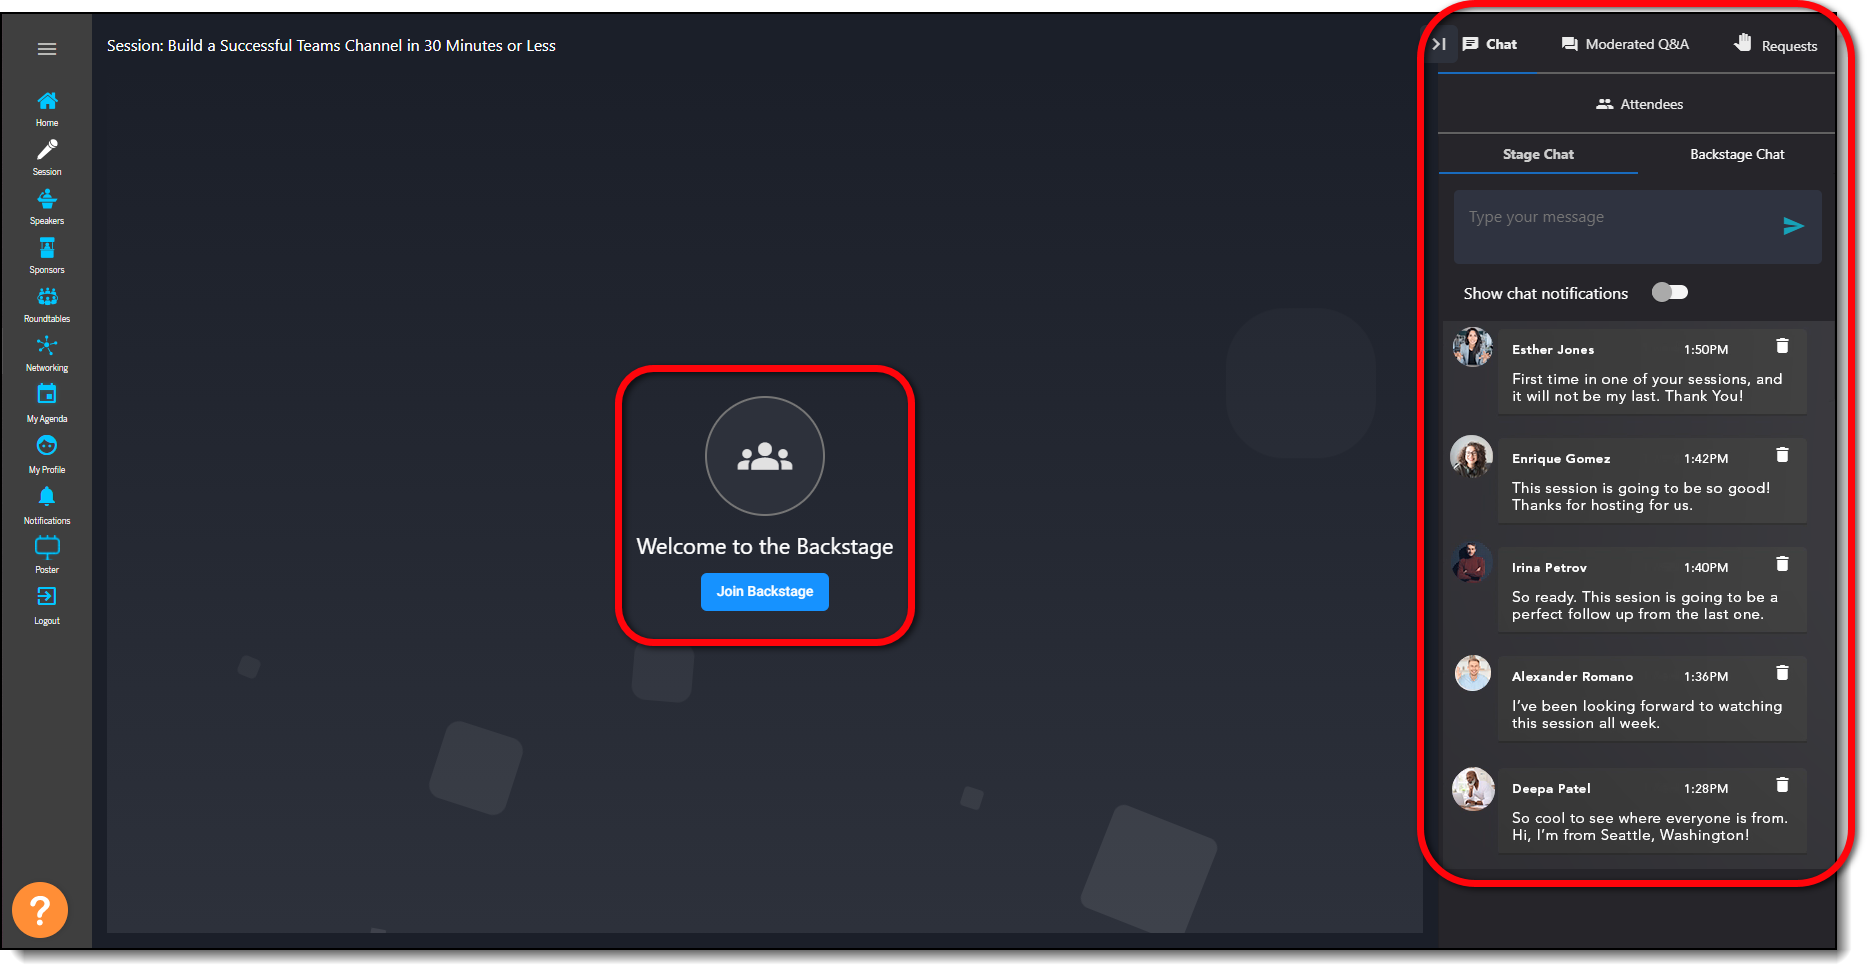
When the session loads, you may see attendees already using the session chat on the right side of the screen, even though the session hasn’t officially started. Click the Join Backstage button to meet with the rest of your session team and prepare to start your session.
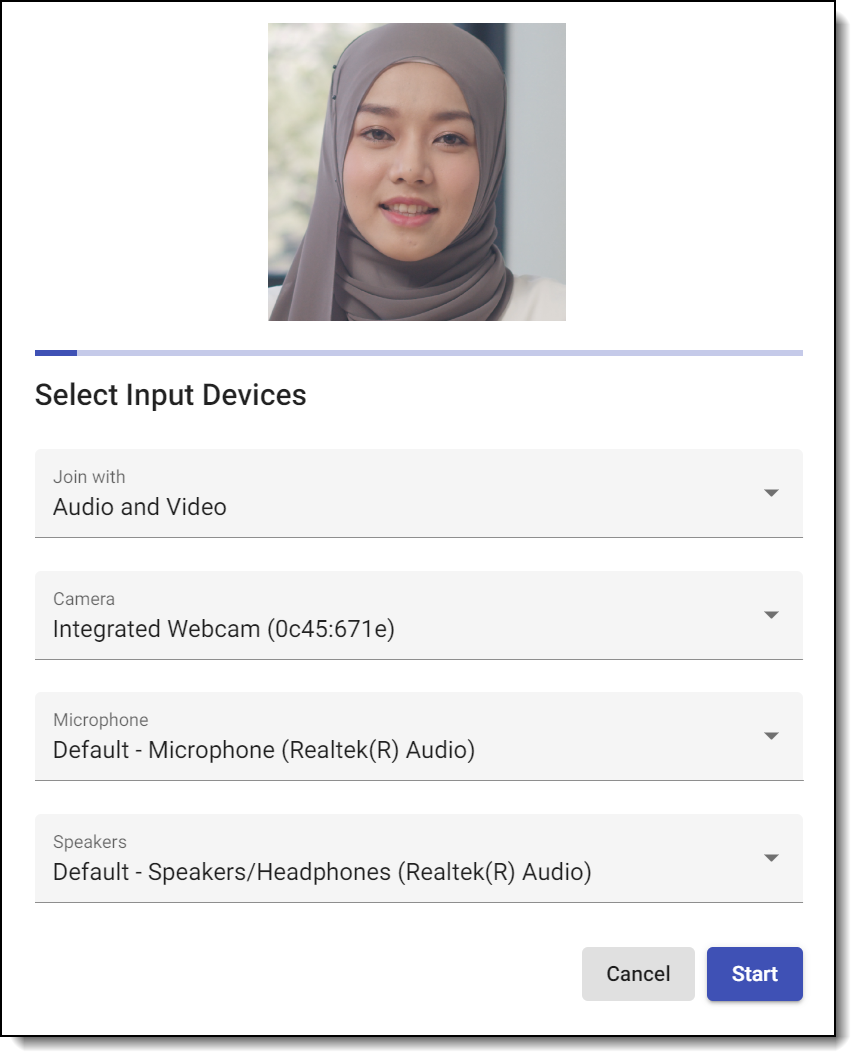
You’ll be asked to confirm your input devices, including the camera, microphone, and speakers before you join the Backstage.
Prepping for the Session
Once backstage, you'll be able to see the rest of your team, prep the speakers, test videos and slides, and perform all necessary tech checks.
The status button in the top left corner indicates that you are backstage (a). Once the session goes live, you will be able to see the number of live session attendees in the bottom left corner (b), use the buttons on the bottom of the session player to share your screen and adjust video settings (c), and use the Backstage Chat to send chats to your session team that won’t be seen by session attendees (d).
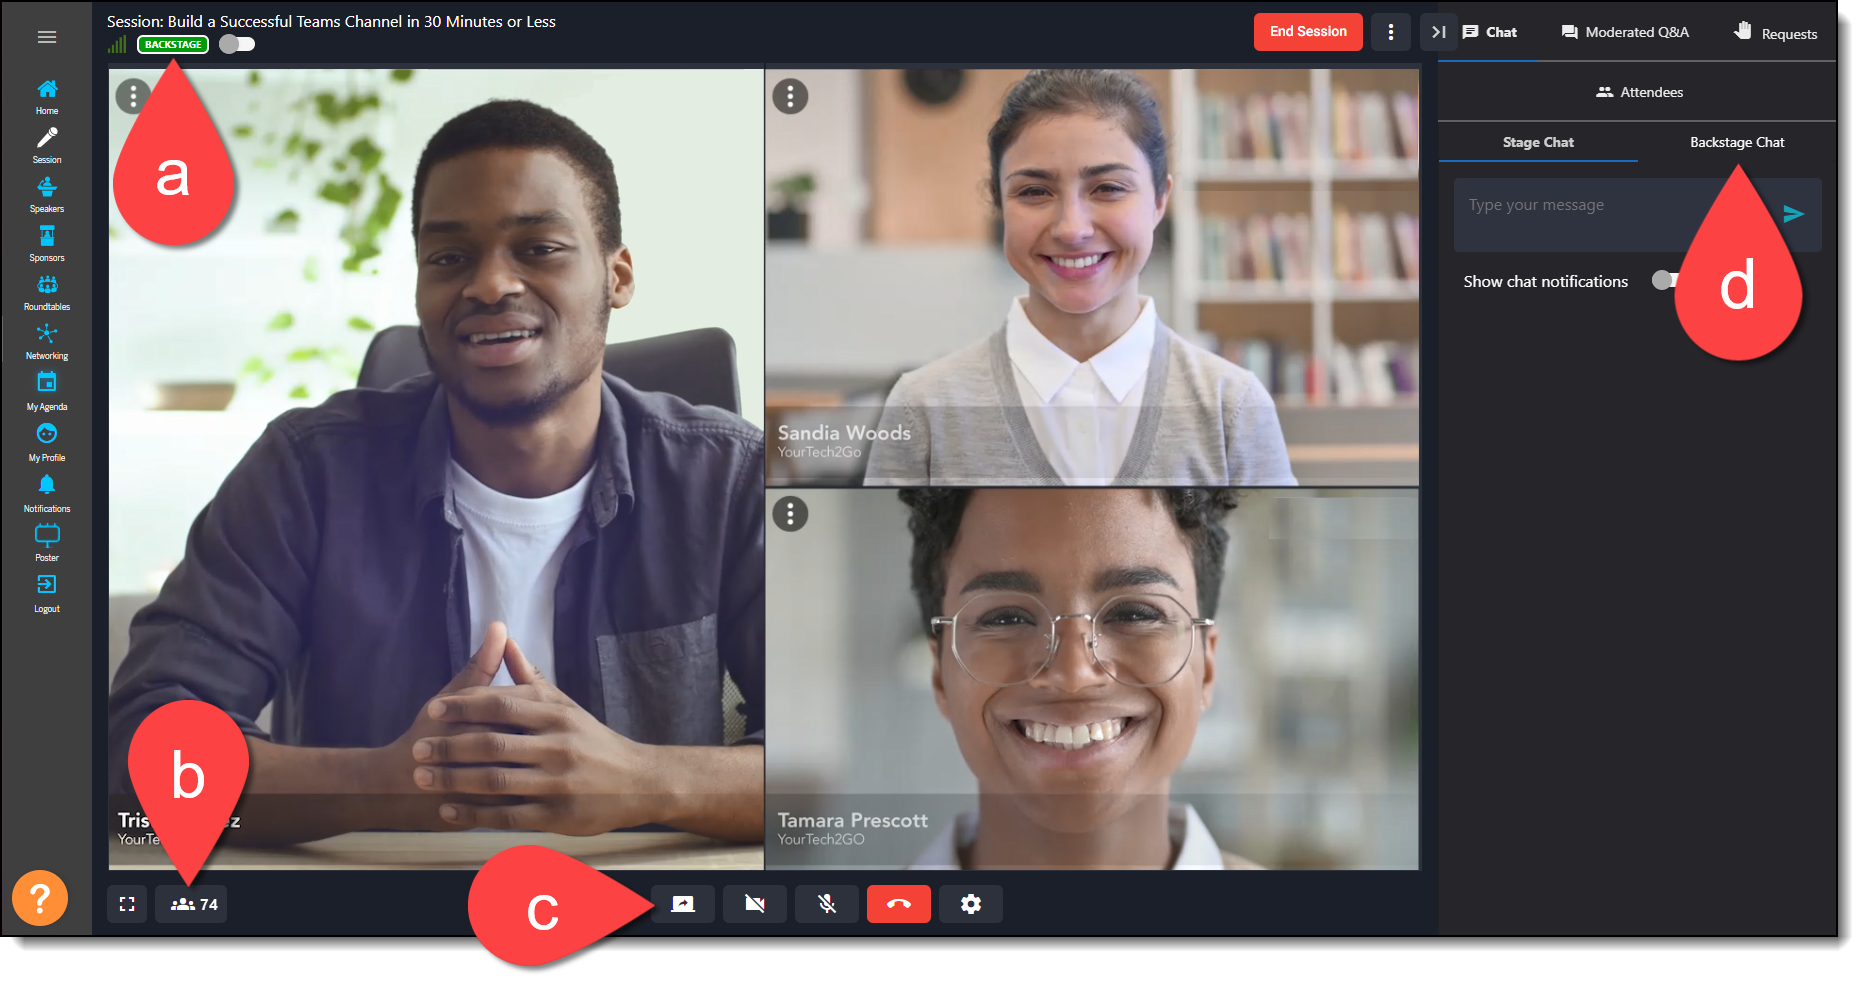
Note: Users who use a Safari browser will NOT see the screen share option. If you want to share your screen, we recommend that you access the session using Google Chrome.
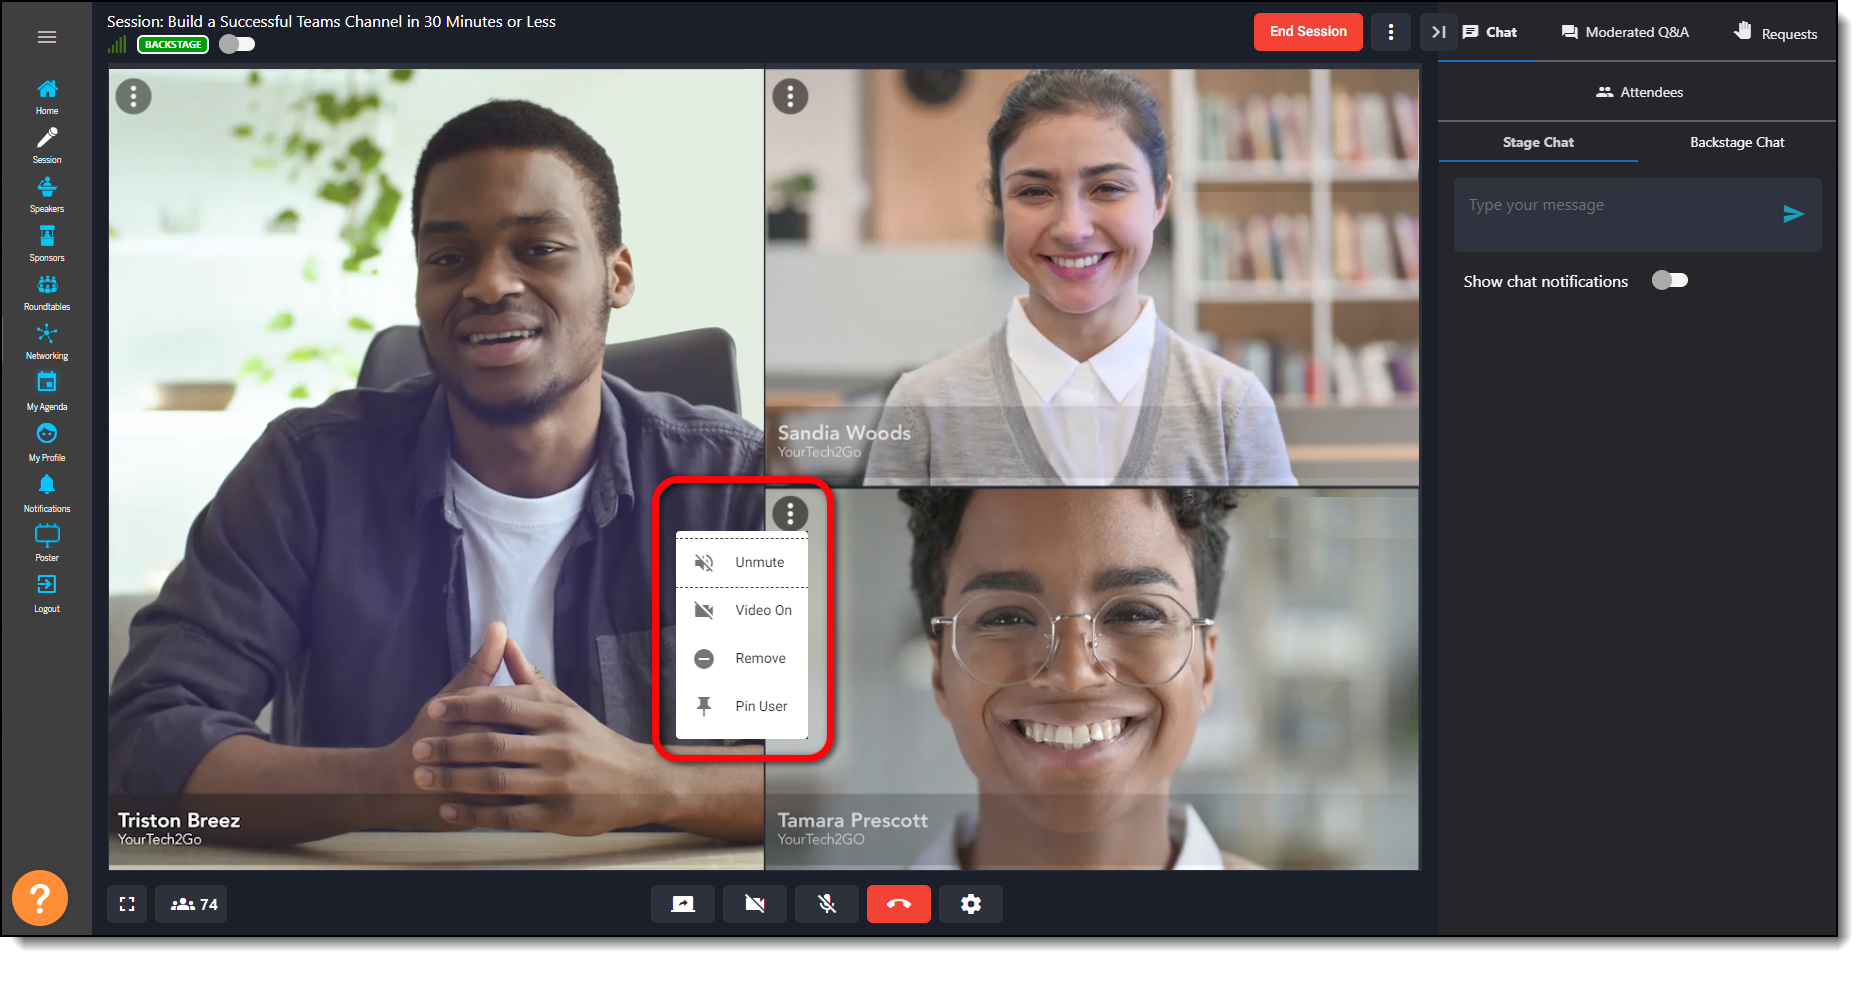
Click the ellipses icon above a speaker or moderator to mute their audio, turn off their camera, or remove them from the session if necessary.
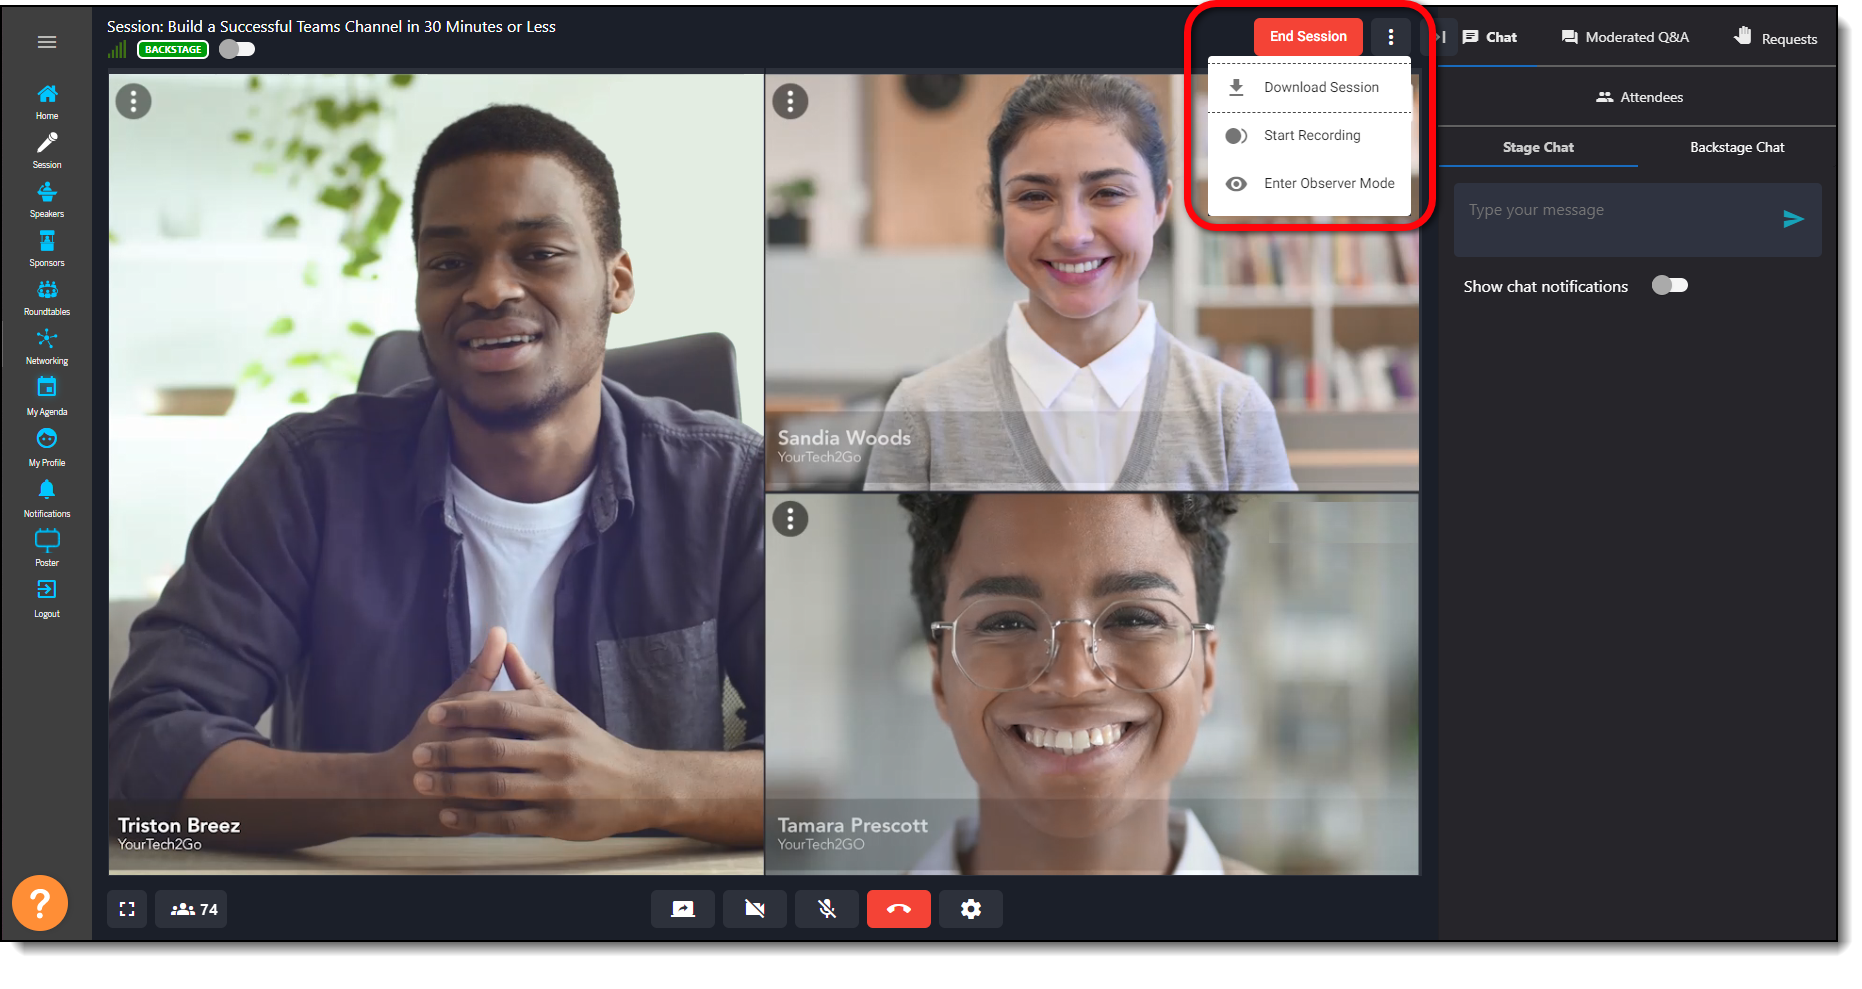
Click the ellipses icon in the upper right to start recording the session.
Once the session is recording, you’ll see a red dot in the top right corner of the screen and a count of how long the recording has been going.

Managing a Live Session
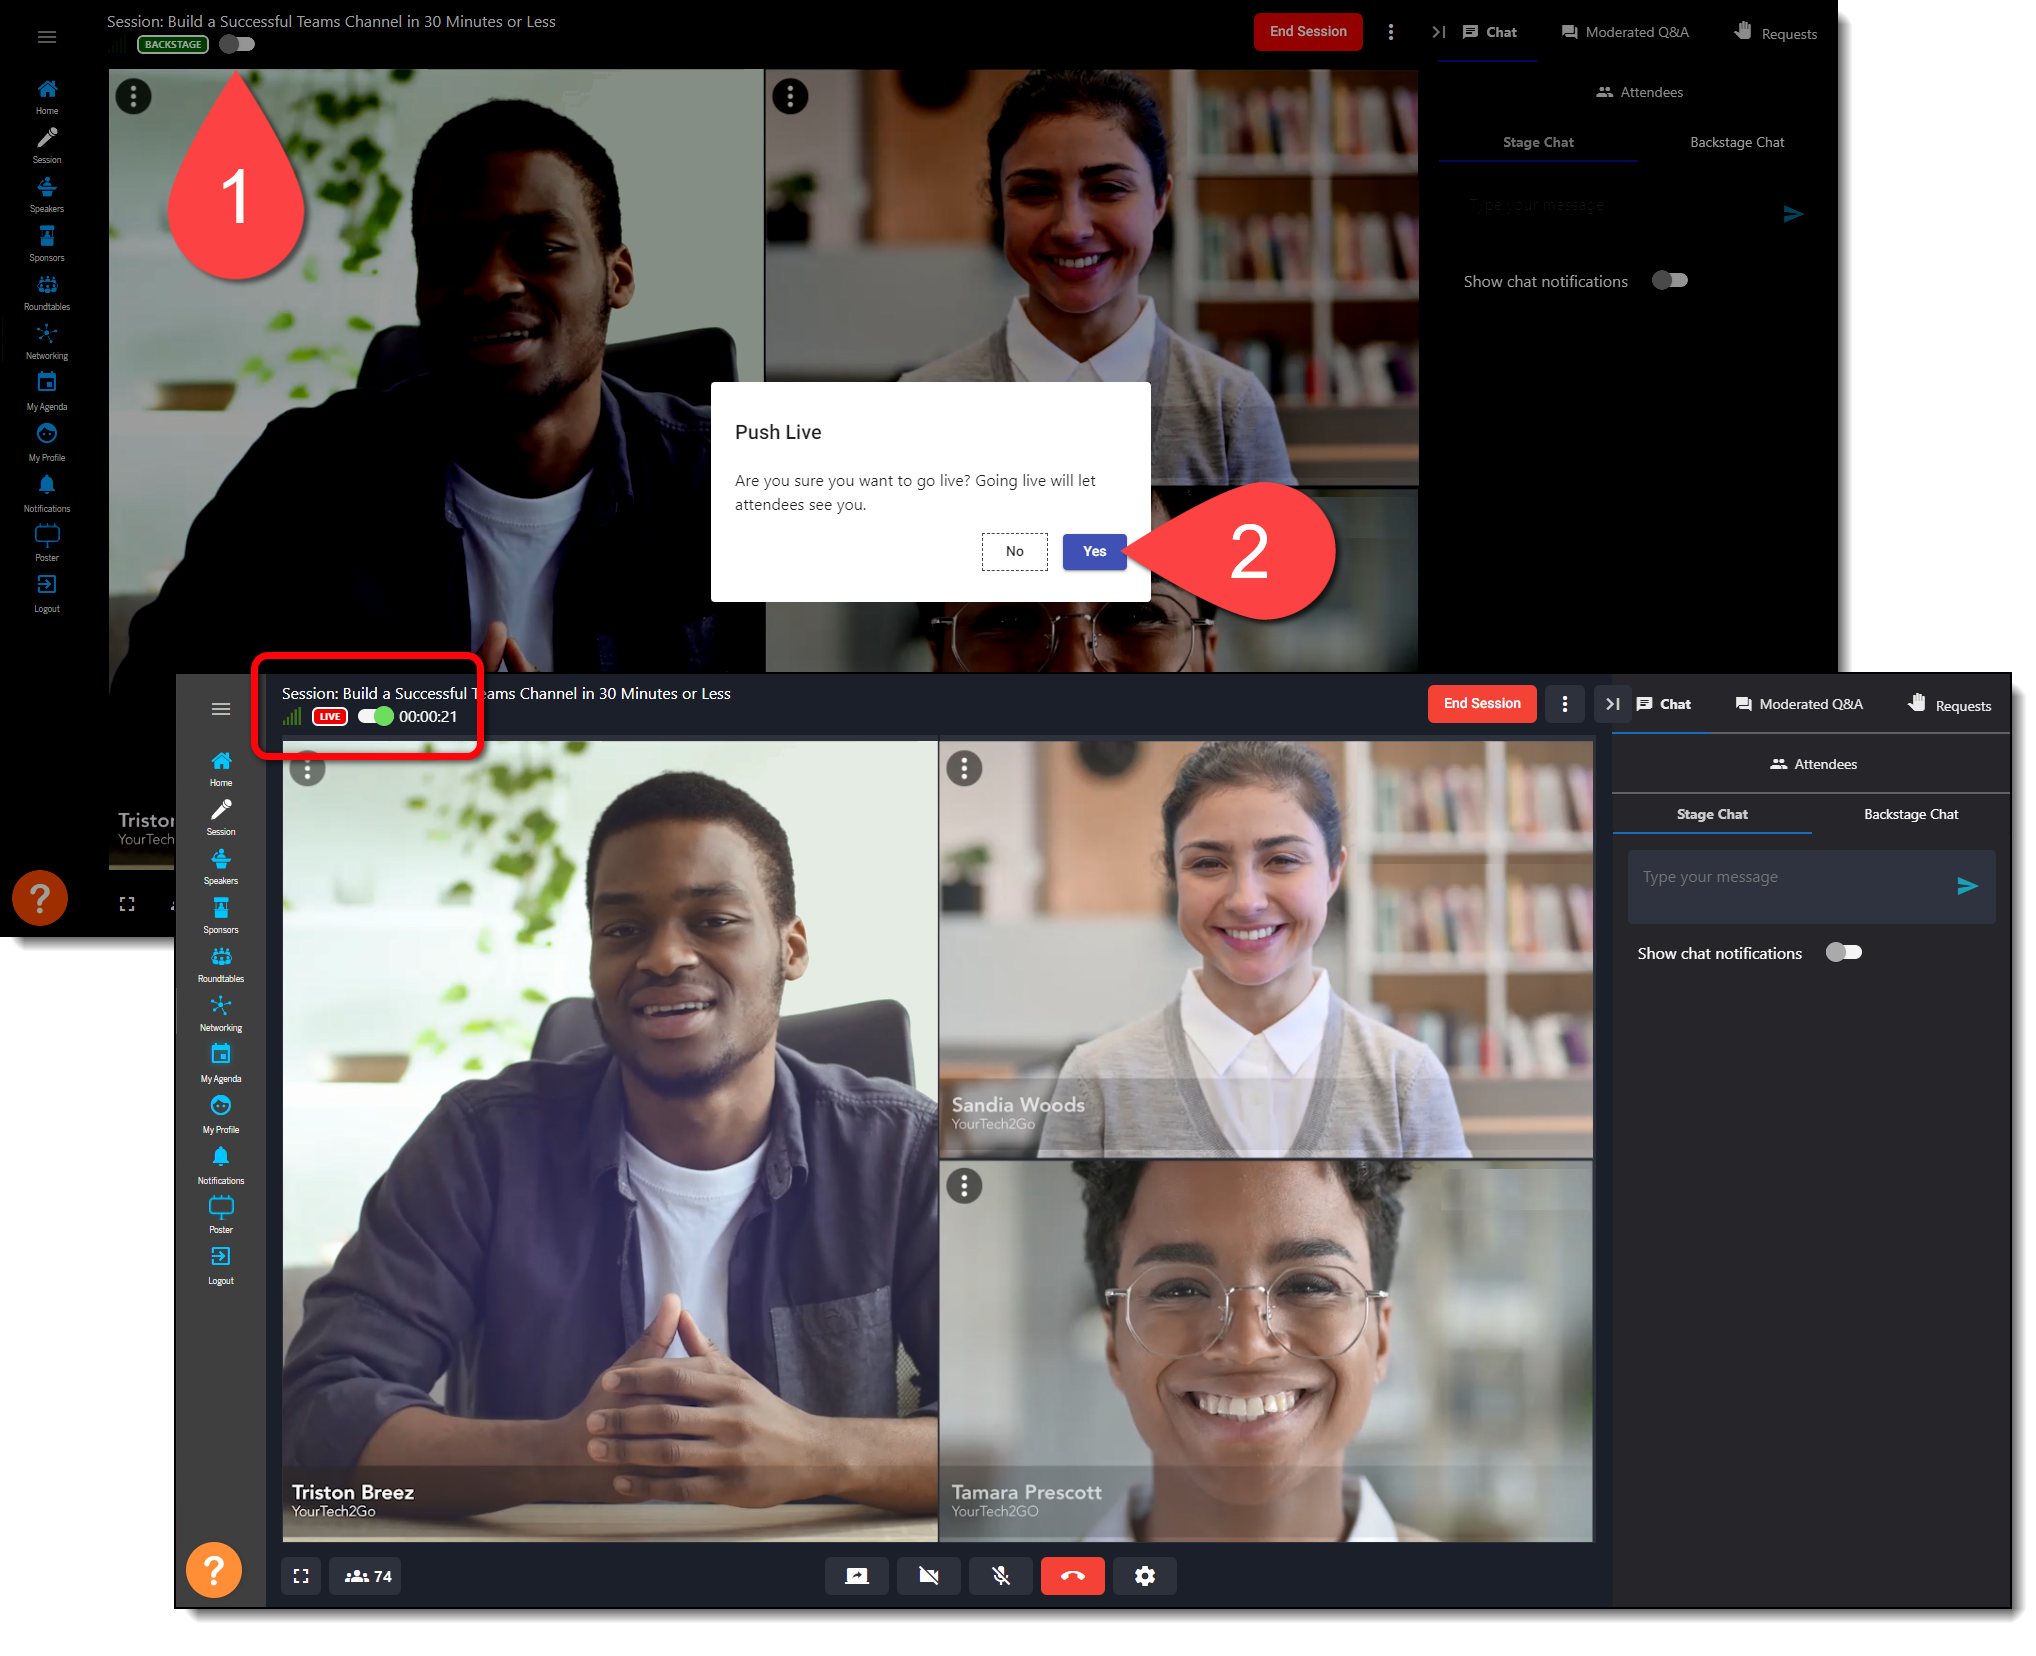
Once your team is ready to go live, click the toggle in the top left corner of the screen and confirm that you are ready to go live. After a 5-second countdown, the session will be pushed live, and the status bar in the top left corner will change to Live.
Session Chat
The Chat sidebar on the right side of your screen contains two tabs: Stage Chat and Backstage Chat. Session attendees can communicate with one another using the Stage Chat, and you can continue to use the Backstage Chat to talk behind the scenes with your team. (Backstage Chat does not appear to session attendees.)
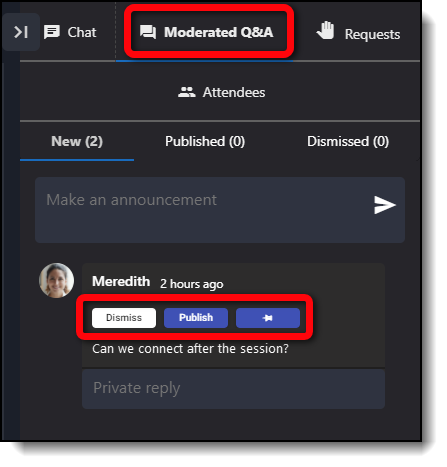
Attendees can use the Moderated Q&A tab to ask questions of the speaker. These questions will appear in the New tab. As a moderator, you can choose to handle the questions using the following methods:
|
 |
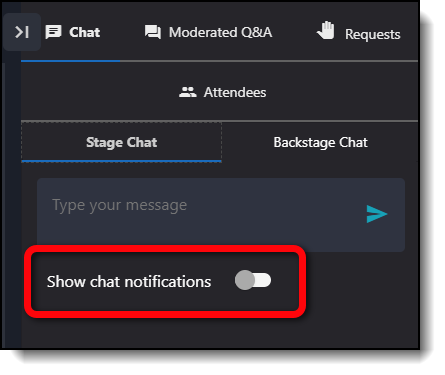
At any point, you can toggle on chat notifications to see an alert in the bottom corner of your screen whenever any new comments come in.
Attendees on Stage
Attendees can request to join the stage and share their camera and audio to ask questions of the speakers. Such requests will appear in the Requests tab. You can approve or reject these requests, and after an attendee has joined the stage, you can withdraw them at any time as needed.
Feel free to disable the feature if you do not want to show the join stage option to attendees. You can also disable or enable the feature during the session
Observer Mode
Click the ellipses icon in the top right corner of the screen to enter Observer Mode, which allows you to continue watching the session without visually appearing in the session.
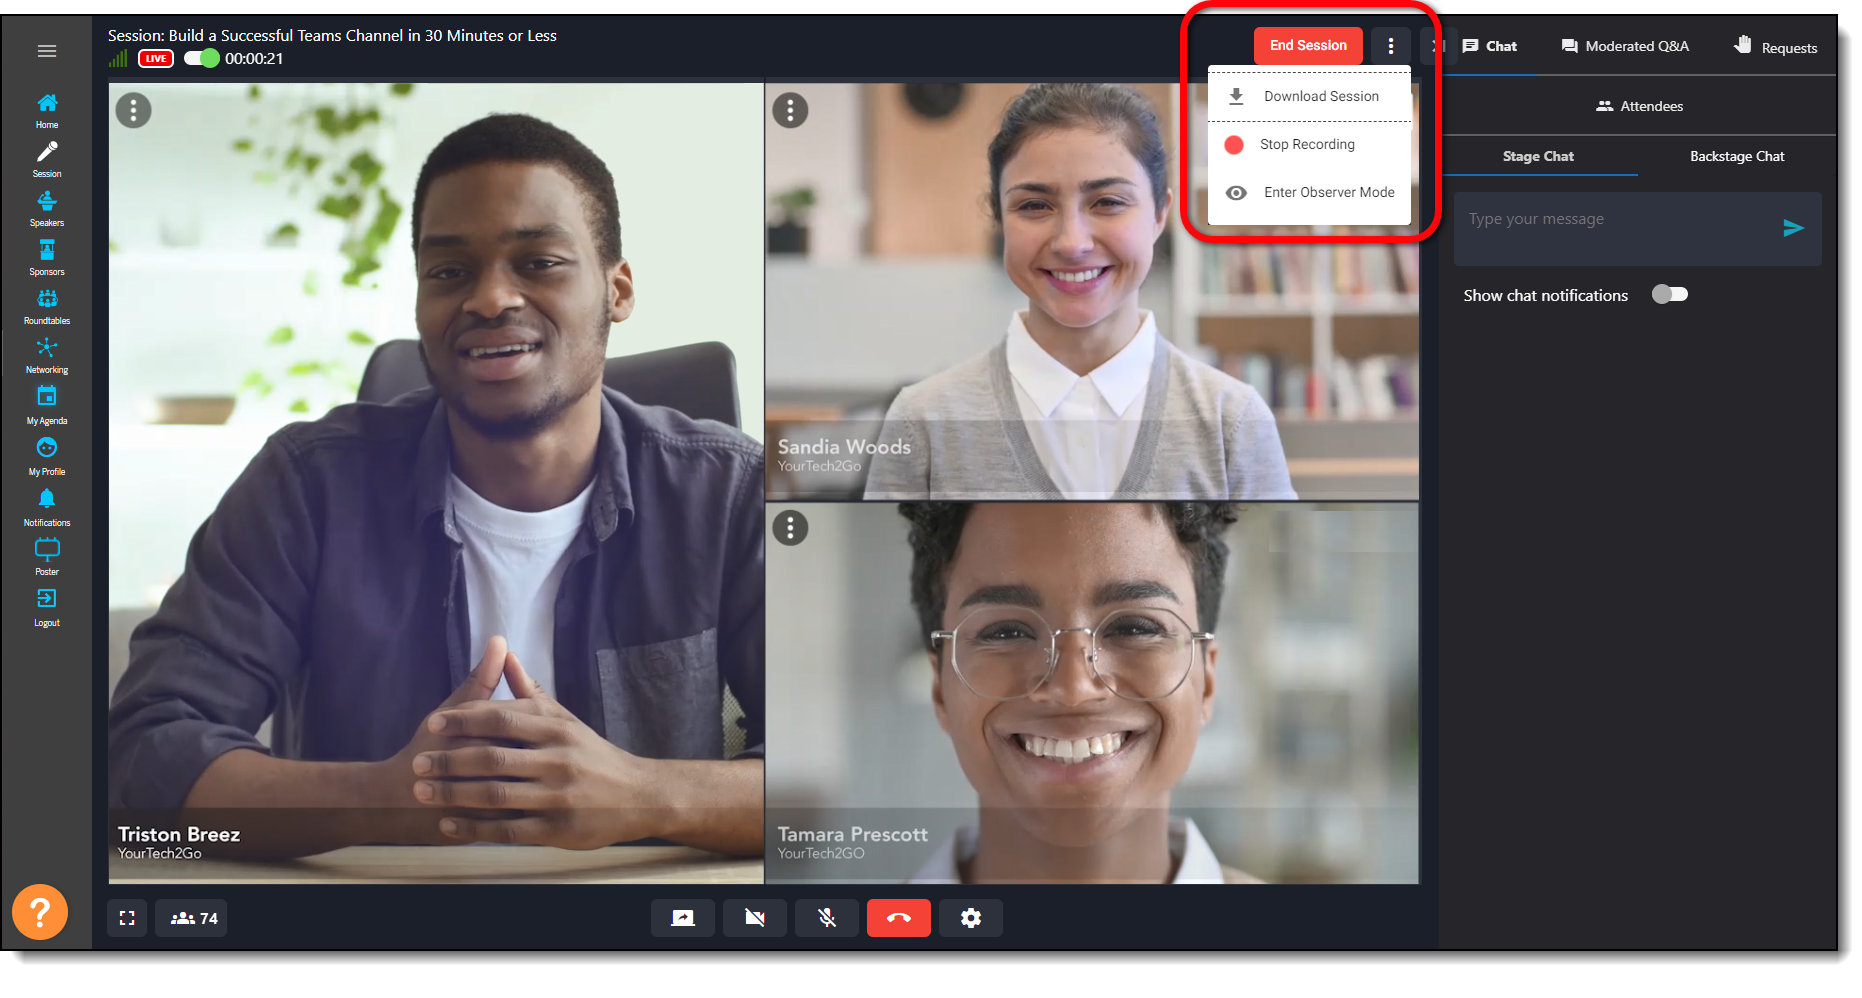
You can exit Observer Mode and rejoin the session at any time by clicking the Rejoin button.

Session Recordings
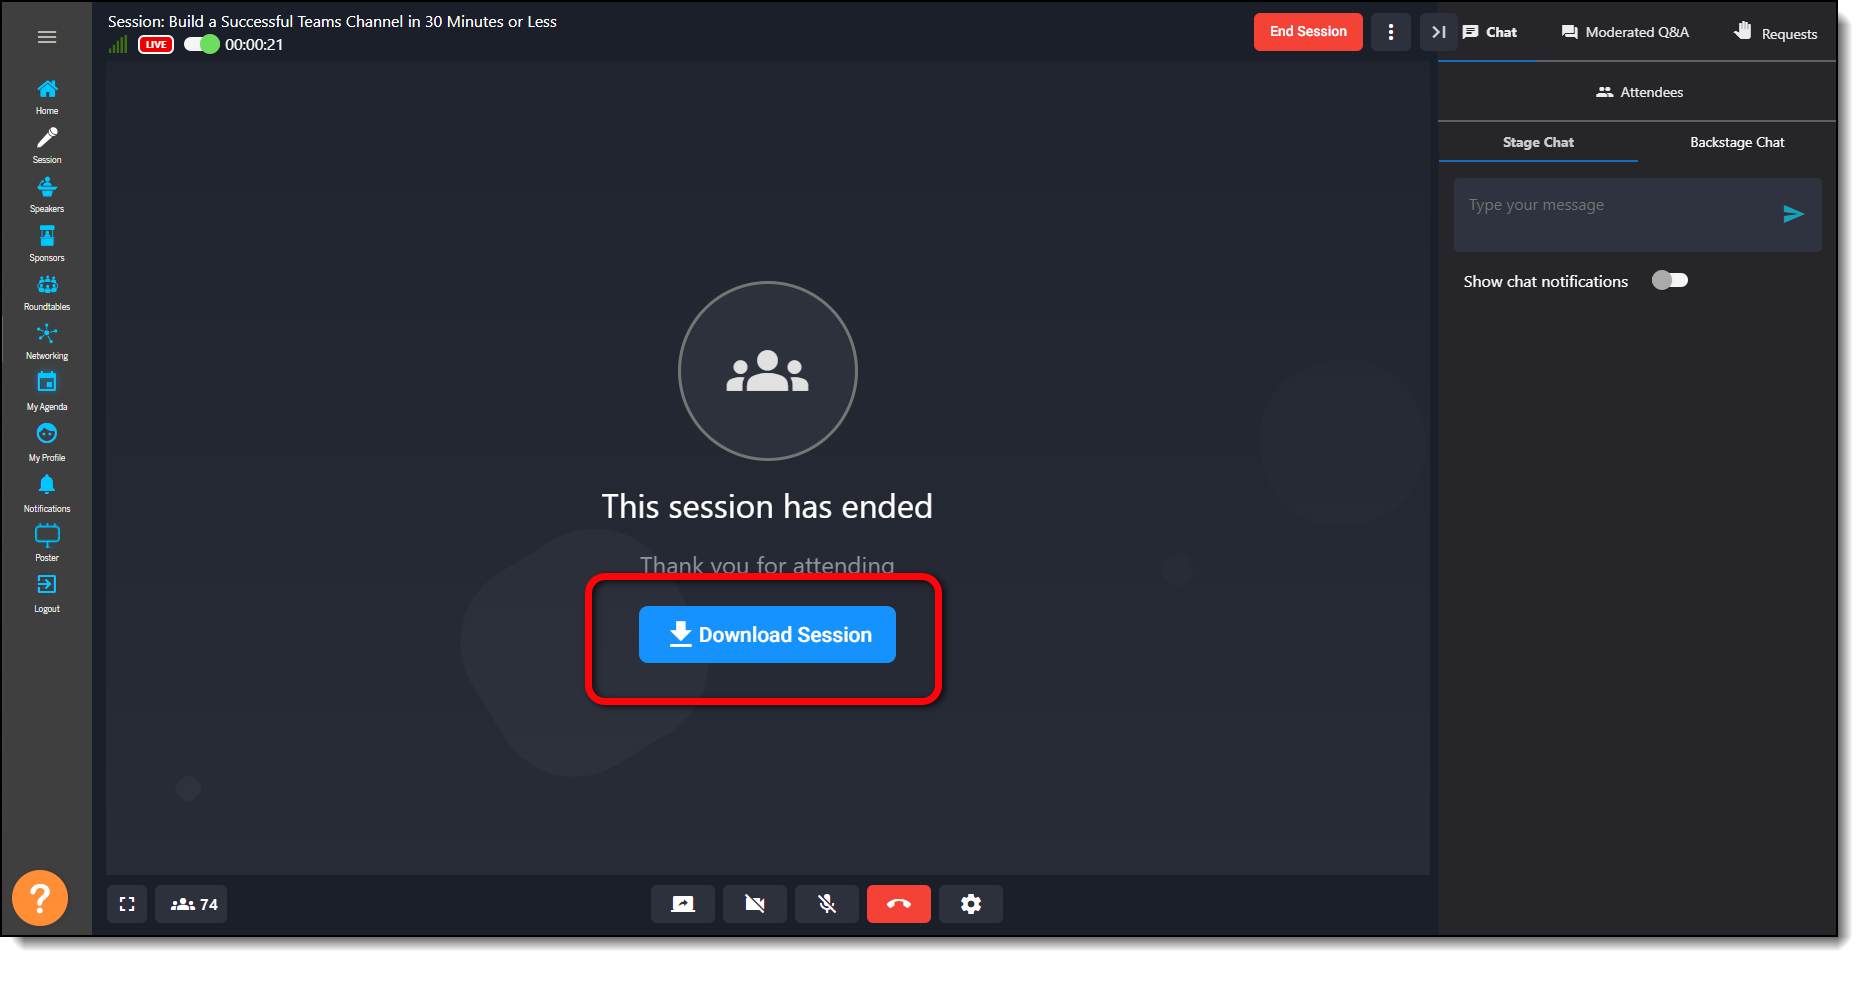
After the session is over, you can stop your recording, end the session, and download the session using the controls in the top right corner of the video screen.
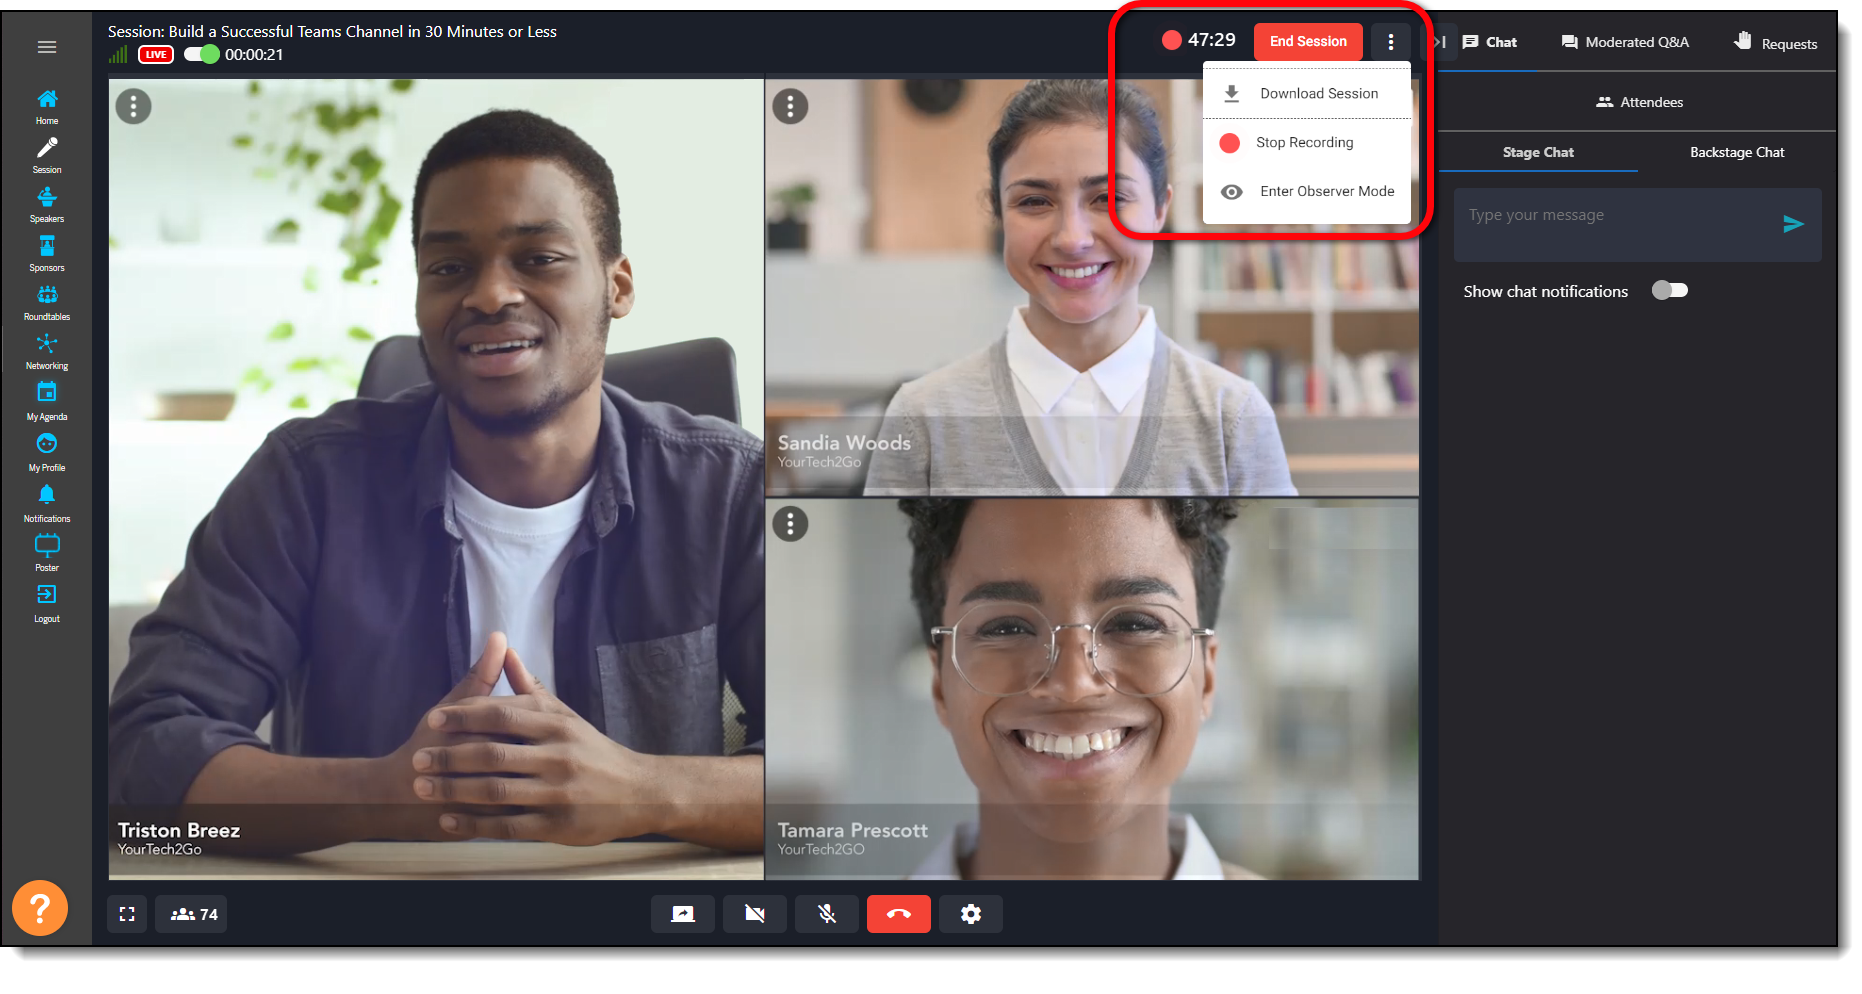
Clicking Download Session will reveal all recordings for that session. You must click Stop Recording for a recording to appear in the list.
On this popup window, you will see the following information:
- Session code
- Session Name
- If you stop and restart recording during a session, each recording will appear as a separate file, appended by -01, -02, etc.
- If a recording has finished processing, you will see a download button to download an MP4 file.
- If a recording is still processing, you will see a Processing
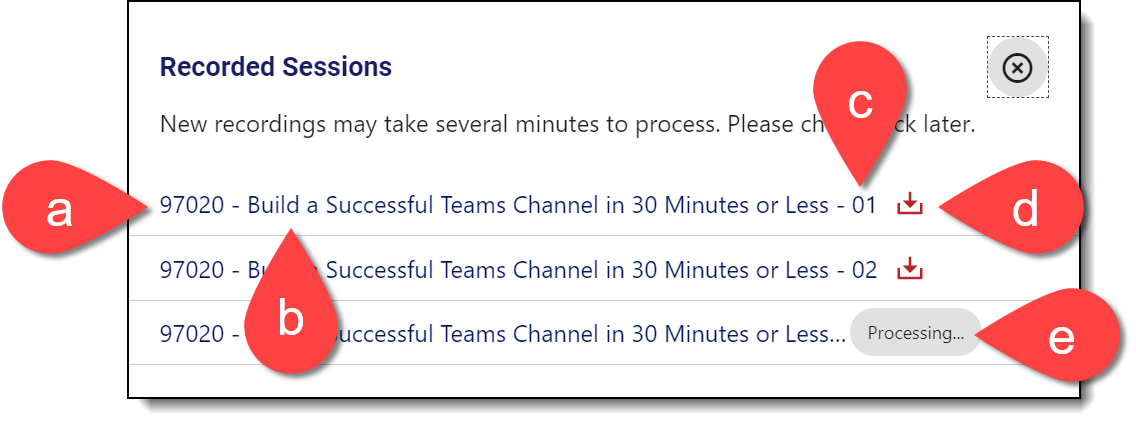
You can also access the Recorded Sessions popup from the main session page after the session has ended.
Notes:
If a user turns off their camera during the session, the recording will capture a black space for their section of the screen (and will not display their profile picture, as is seen by live viewers).
If you enable and use integrations with Miro or Figma, the content from Miro/Figma will NOT be included in the recording (although all other session audio, video, and screen shares will).
Ending a Session
Once your session is complete, don’t forget to click End Session. This will close the session and notify anyone who attempts to join it that the session has already ended.
Note: Once you close a session, it will no longer be accessible by any users, so make sure you actually are ready to end the session before you click this button!
Comments
0 comments
Please sign in to leave a comment.