In the Social27 Events Platform, you can organize your event sessions by adding them to tracks, which appear as tabs on the Sessions page. Tracks can help create a structure for your sessions and assist attendees in browsing through them.
Walkthrough Video:

This article explains how to create and edit session tracks.
Creating Tracks
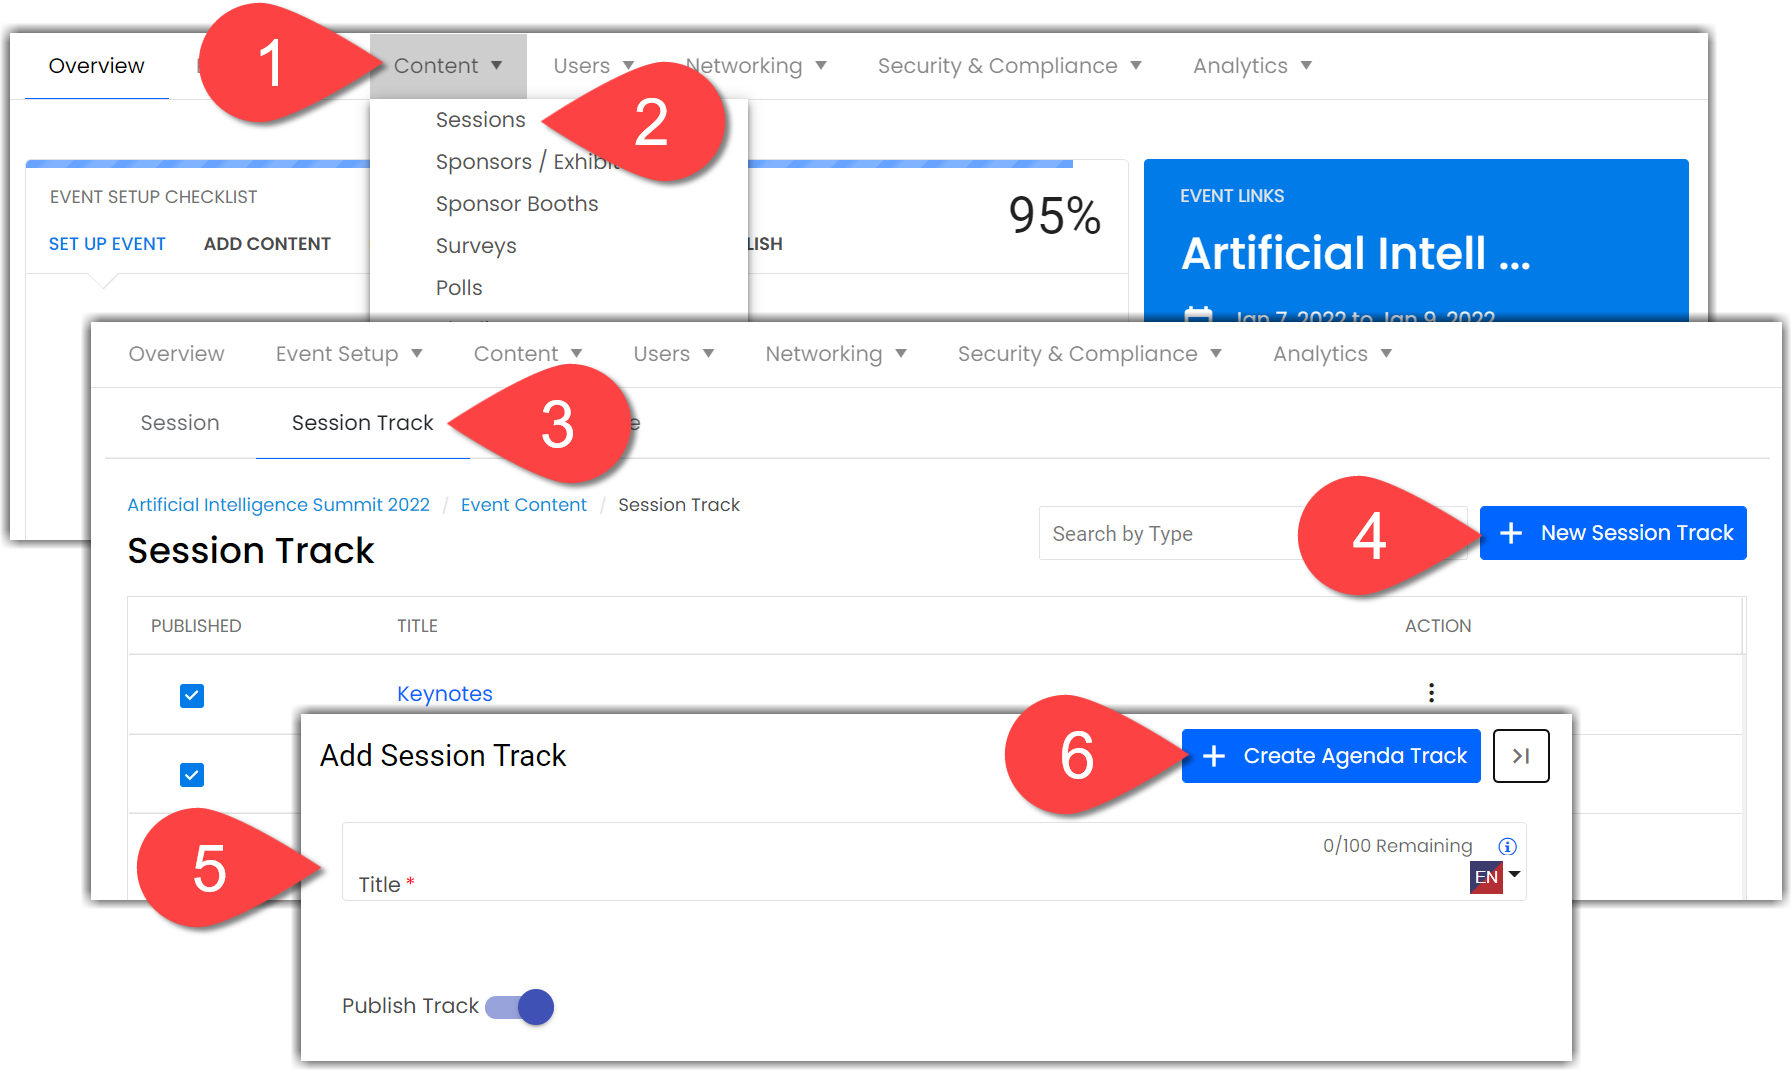
To add a session track to your event, log in to the platform, select a workspace, and open an event. Navigate to Content > Sessions using the top toolbar. Select the Session Track tab, and click New Session Track. On the New Session Type screen, enter a name for the session track and click Create Agenda Track to save your changes. You can turn off the Publish Track toggle to keep the track from displaying on the event site.

Tracks are meant to organize sessions, so chose names that will best fit your event. Examples of session tracks include:
|
Editing Tracks
To edit a session track, click the ellipses icon beside the session track you wish to update and select either Edit or Delete.

How to Create/Manage Sub Tracks?
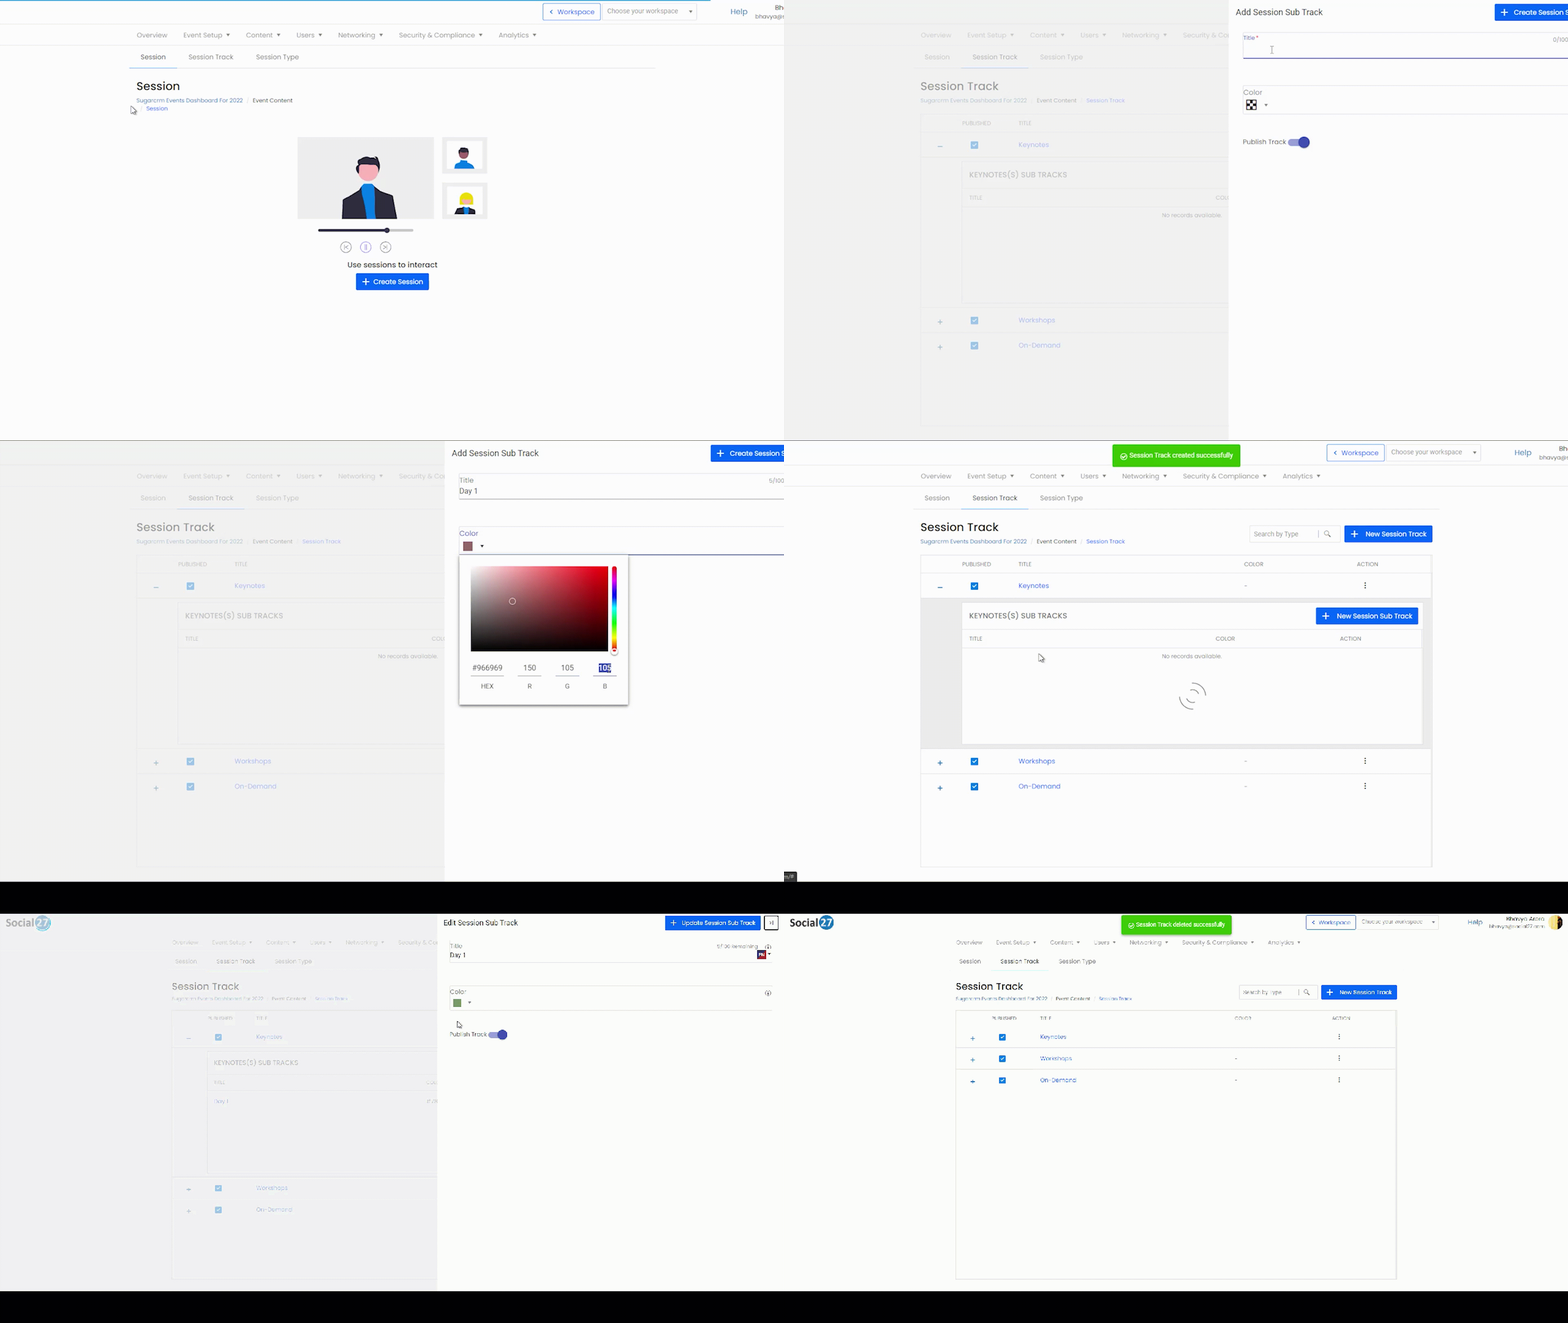
Once you have created session tracks, you can create an additional tier of "session sorting" by creating sub-tracks. To do this, select Content > Sessions select Session Tracks, and then select the plus button right next to the track to add a sub tacks.

Adding session sub-tracks allows you to further bifurcate the agenda page, which makes it easier for the attendees to navigate and also increases the ease of accessibility specially if you have a lot of agenda items.
![]() Further Reading :
Further Reading :

Comments
0 comments
Please sign in to leave a comment.