Sessions are one of the primary methods by which you and your event speakers can convey useful content to your event attendees. In the Social27 Events Platform, you can create different types of sessions, including live, on-demand, and breakout sessions.
Walkthrough Video:
This article explains how to create and manage sessions. Topics include:
Viewing the Sessions List
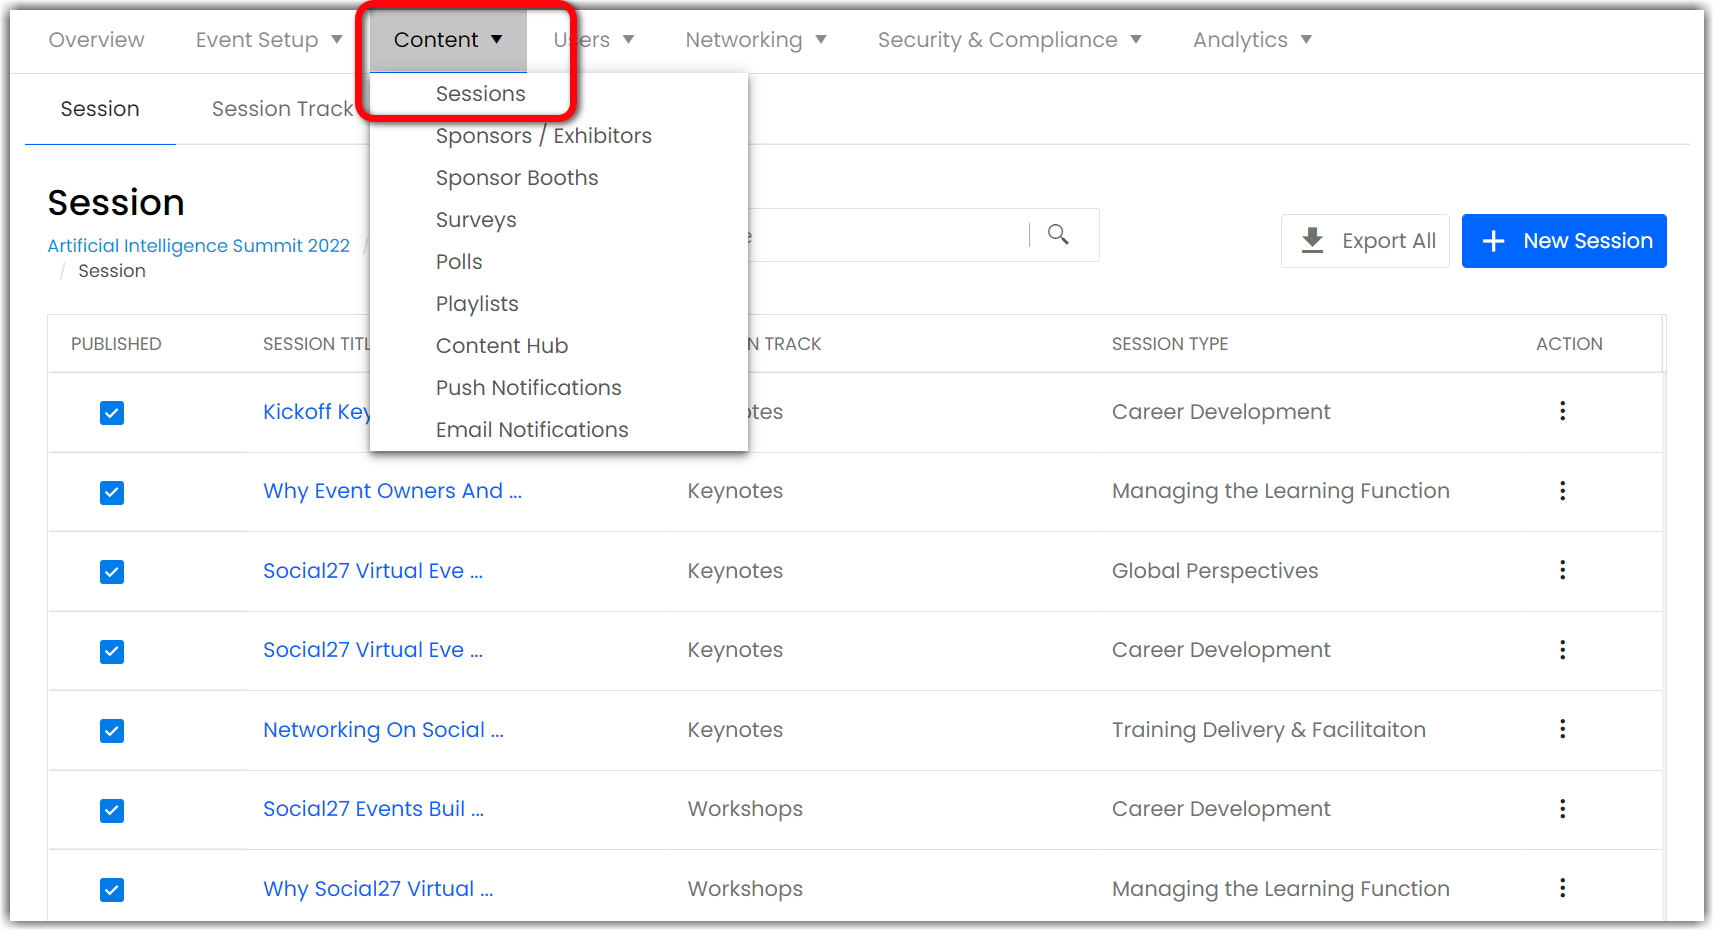
To view all of your event sessions, log in to the platform, select a workspace, and open an event. Navigate to Content>Sessions using the top toolbar.

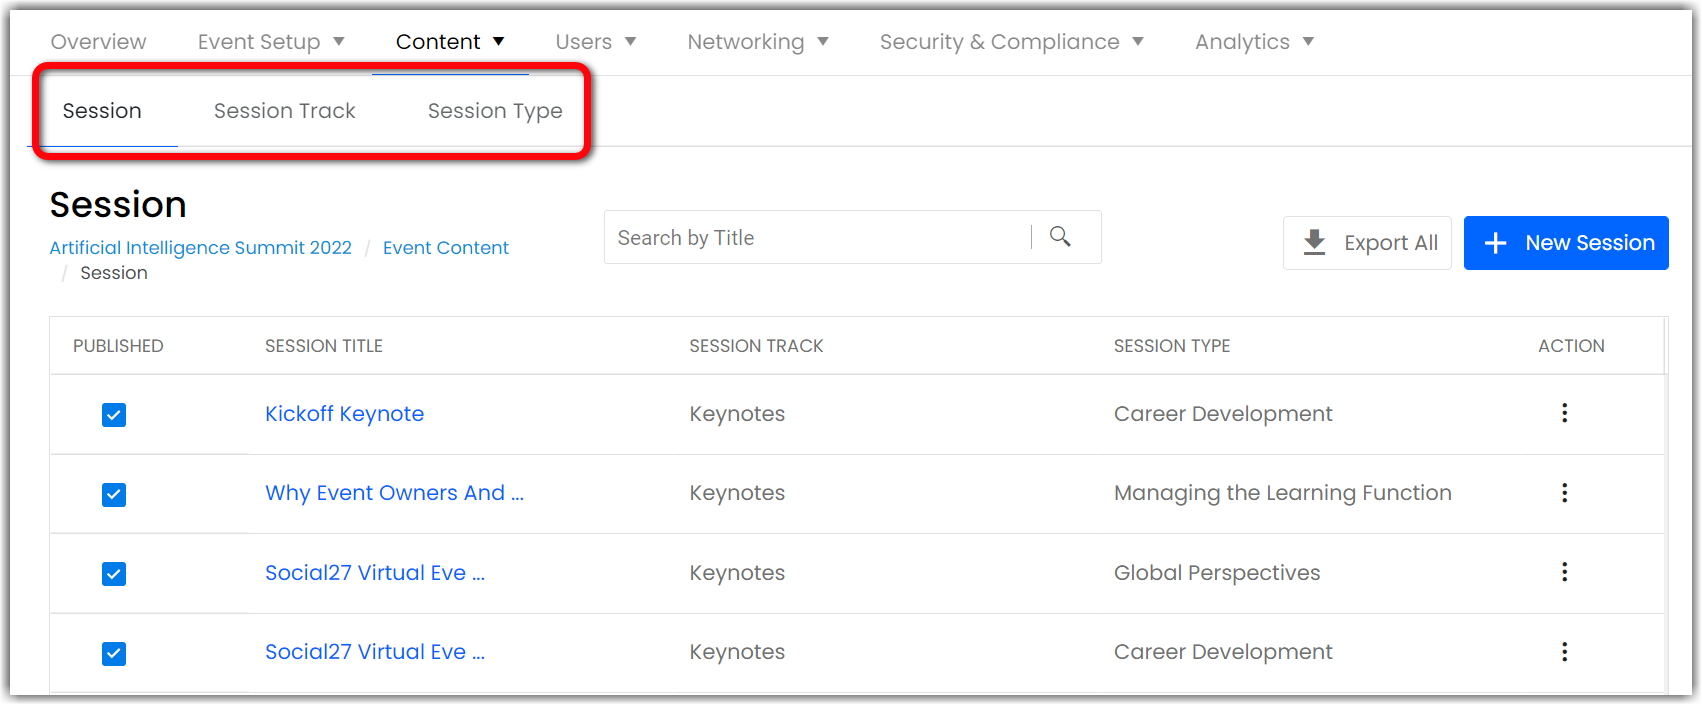
You'll note that this page has three tabs: Sessions, Session Tracks, and Session Types. This article focuses on the Sessions tab. For more information about the other two tabs, check out the following articles:

On the Sessions tab you can:
- Search for sessions
- Export sessions (download an Excel file that contains the columns and data displayed on the Sessions tab)
- Create a new session
- View and change session publication status
- Preview sessions
- Manage session media and add session resources
Creating a Session
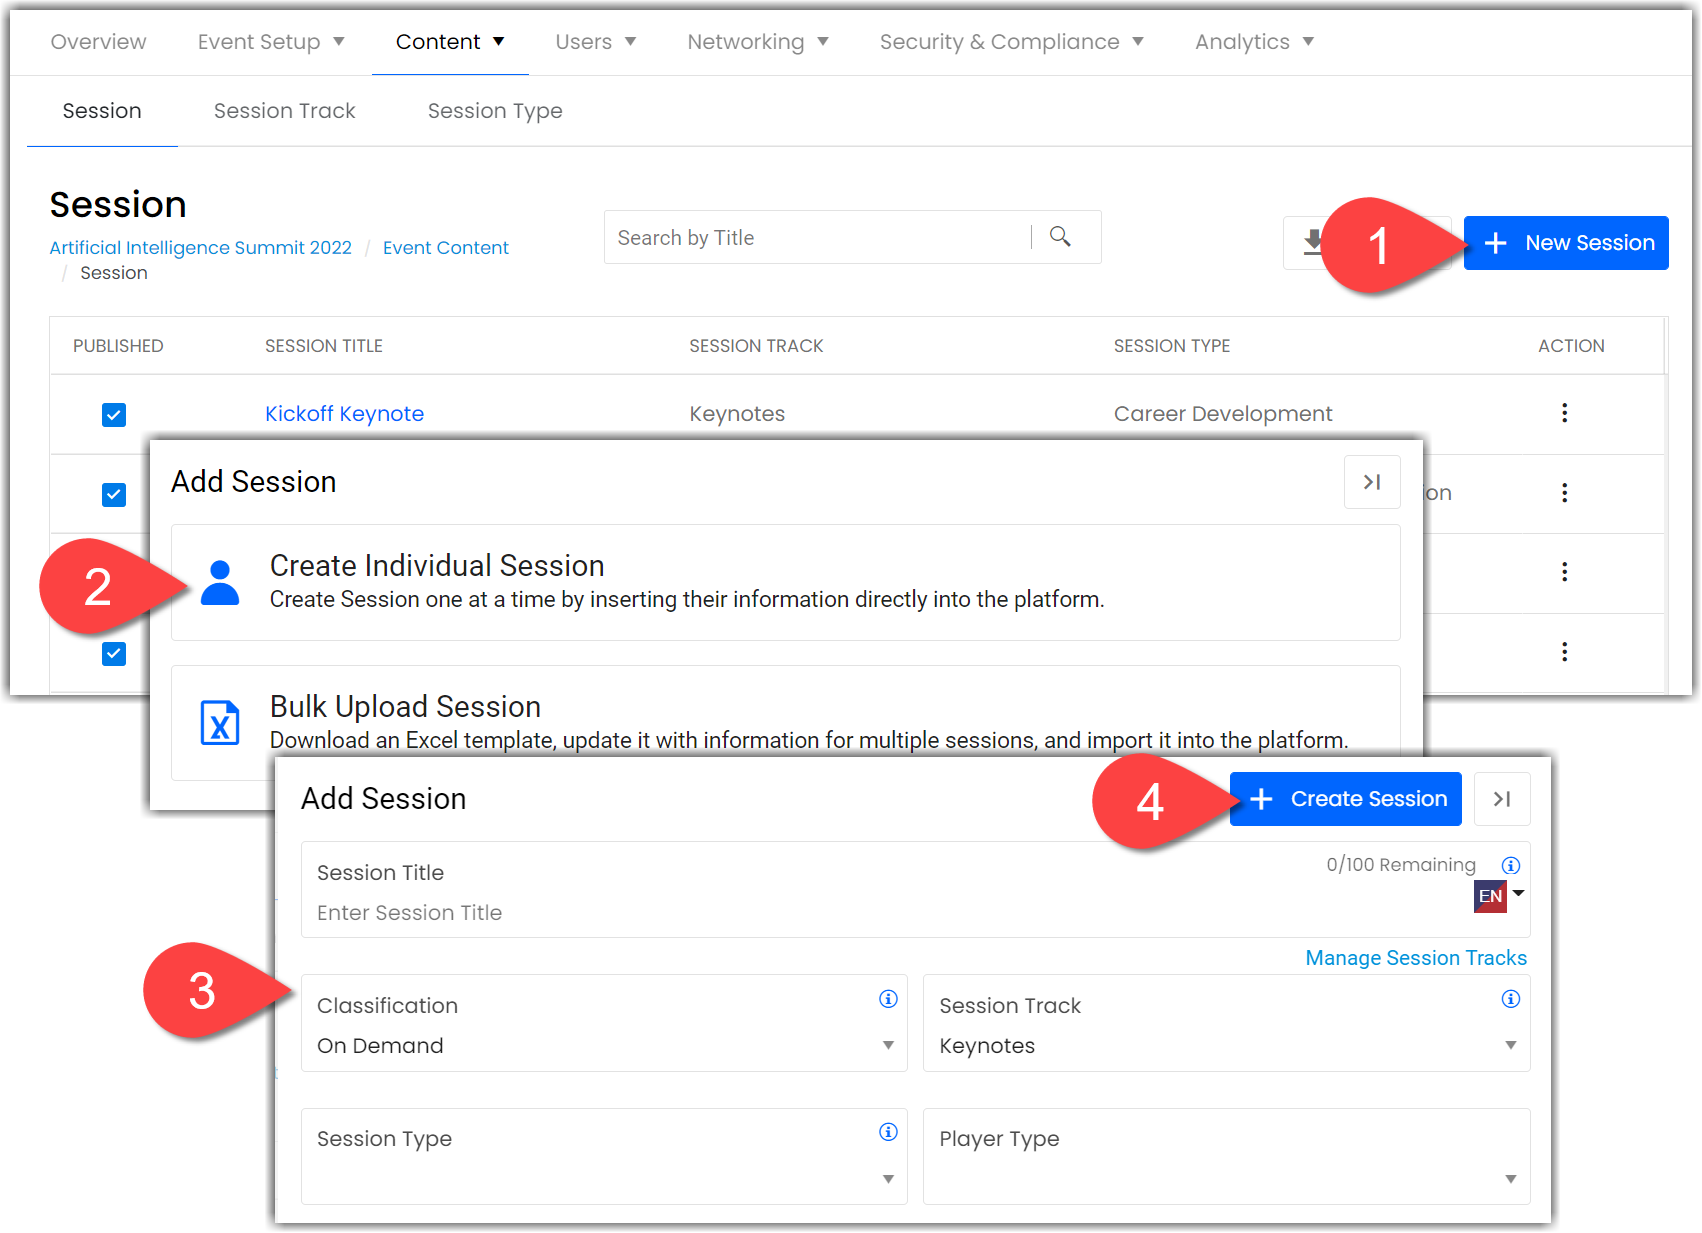
To create a session, click New Session in the top right corner. Click Create Individual Session. (For information about how to bulk upload sessions, check out this article.) Complete all necessary information on the Add Session screen and click Create Session to save your changes.

See below for an explanation of the fields that appear on the Add Session screen.
- Classification: Sessions can be live, on-demand (pre-recorded), or breakout.
- If you select On Demand, you do not need to enter the start and end dates/times.
- If you select Breakout, you will see a new Breakout Link field.
- Session Track: Use session tracks to organize your sessions and how they appear on the event site’s Sessions page. You can add a new track by clicking Manage Session Tracks.
- Session Type: These are topic areas into which sessions can be categorized (e.g., Talent Strategy & Management, Career Development, etc.).
- Player Type and Media URL: Enter the session's media type and URL in the Player Type and Media URL fields (embed, YouTube, etc.). You can also manage session media by clicking the ellipses icon on the main Session page.
- Overview: A description of the session
- Session Code: A session code is auto-generated, but you can update it to keep your sessions organized. This code is only visible only to event organizers.
- CEU Credit: Fill out this field if you would like to award attendees continuing education credits if they watch the session.
- Areas of Interest: Including these will help like-minded attendees find sessions of interest to them.
- Speaker: To add a new speaker, navigate to Users > Speakers.
- Session Thumbnail: These images may or may not be displayed on the event site based on the session component layout you select in Event Setup > Pages & Design.
- Sponsor: To add a new sponsor, navigate to Content > Sponsors/Exhibitors.
- Publish Session: Sessions will only appear on the Sessions page if this toggle is enabled. You can also publish and unpublish sessions by clicking the checkbox on the main Session page.
- Check out the following articles for more information about the other session toggles:
Session Actions
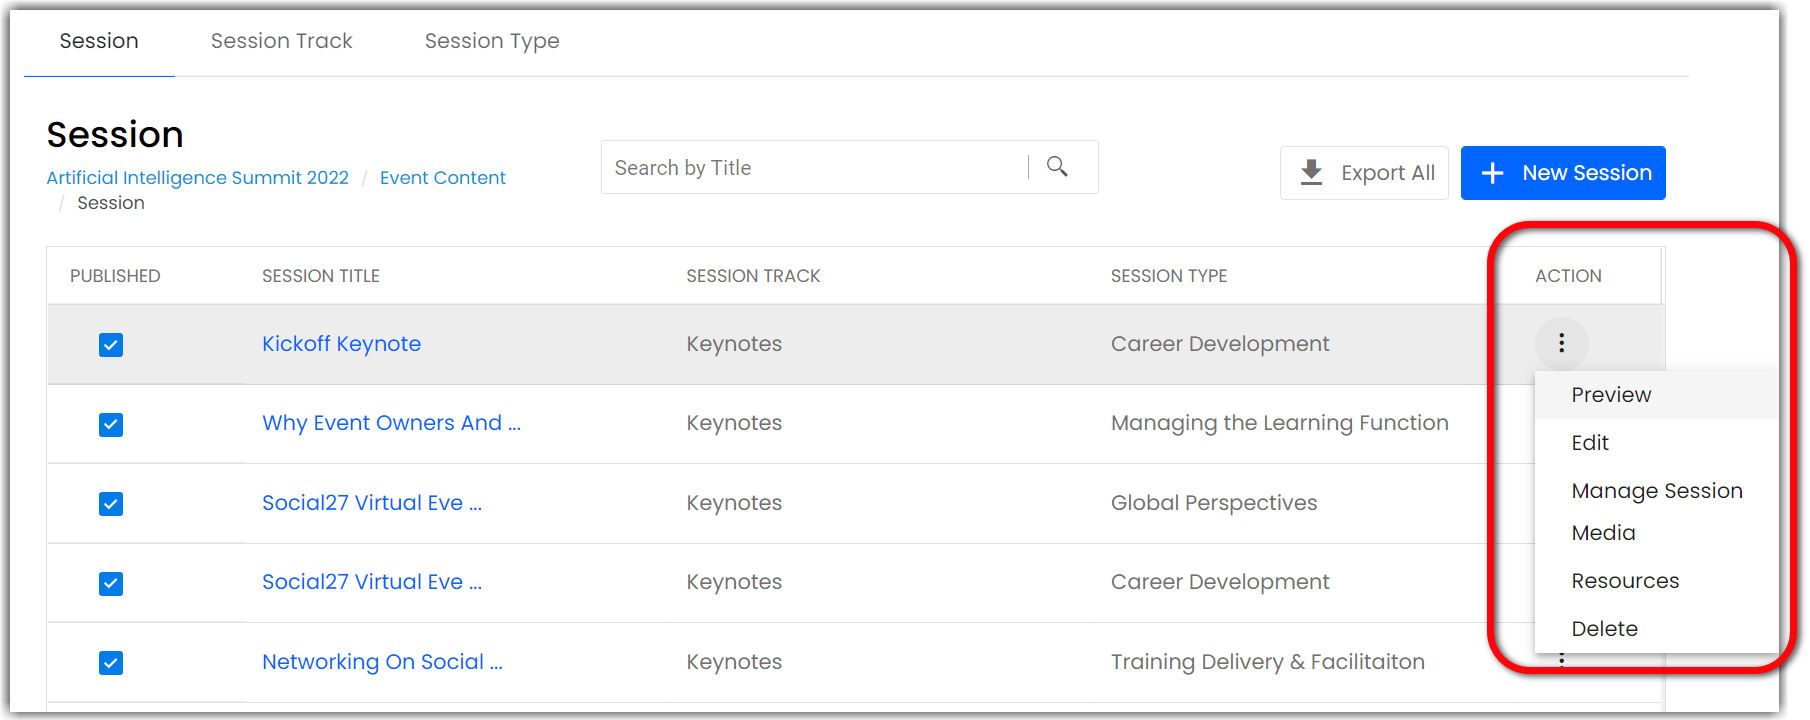
Once you've created a session, click the ellipses icon in the Action column to make changes to it. You can select from the following options:

Preview
You can quickly preview what your session will look like on the event site from the Session tab. Click the ellipses icon in the Action column and select Preview. The event site will open directly to that session in a new tab, allowing you to review and ensure everything looks good.
Edit
Selecting Edit will open the screen containing all session details. Don't forget to click Update Session in the top right corner if you make any changes to the session details.

Manage Session Media
Select Manage Session Media to enter a link or upload your session content. First select the player type from the dropdown then enter the file/code/URL as appropriate. The media types available to you include:
- Zoom
- Teams
- Iframe
- YouTube
- File
- Image
- Embed
- Social27
Don’t forget to click Save after you add your session media.

Resources
Select Resources to upload files that attendees can download from a Resources section on the session player page. Click New Resource, upload the file, name the resource, and click Save. The new resource will appear on the Session Resources page, and you can click the pencil or trash can icons to edit or delete it.

Delete
If you select Delete, the session will be removed from the event and will no longer appear on the event site.
![]() Further Reading :
Further Reading :

Comments
0 comments
Please sign in to leave a comment.